Huckleberry Pastry Puffs

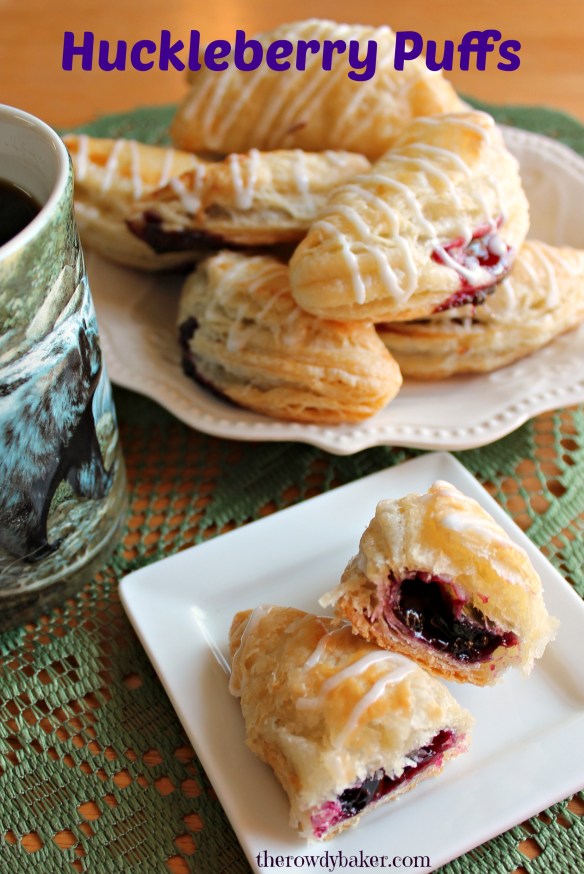
Do you want to create culinary magic? Fill homemade puff pastry rounds with wild huckleberries and prepare to be wowed. These flaky little four-bite pastries will melt in your mouth, and I’m telling you, there is nothing that compares to the flavor of huckleberries.

Of course, if you don’t have access to huckleberries, blueberries are a good option. I found frozen organic wild blueberries that are impossible to tell apart from huckleberries, so use whichever variety you can get your hands on.

Rough puff pastry is really very simple to make. (You could use store bought puff pastry, but it will be more crisp and brittle.) Once you get the hang of it, you’ll probably want to use it for lots of other treats, like danish, croissants, or strudel. Here are two of my favorite strudel recipes: Sour Cream Apple Strudel and Sausage Breakfast Strudel. The dough can hang out in the fridge for days (let it sit out on the counter for 30 minutes before using or it’ll be really hard to roll out) or can be frozen. It’s not much harder to make a double batch, and it’s wonderful to have some tucked away for later.

I made the dough and filling the night before and rolled, cut, filled, and baked the little puffs the next morning – in about an hour. You know what makes it go really, really fast? A potsticker press! You can find one for less than $5.00 on Amazon (search for “dumpling press”) or at an Asian market, and I know you’ll find many uses for it. It won’t languish in your kitchen drawer, I promise.

I’d go for the cheap plastic model. This one has lasted years.

Go easy on the filling!

Huckleberry Puffs
Print
Author:
Makes approximately 8 flaky pastries, each about the size of a puffy potsticker. I use a potsticker press in this recipe, but if you don't have one, fold the dough round over the filling and press together firmly with a fork.
Ingredients
  • HUCKLEBERRY FILLING:
  • 1 cup fresh or frozen berries
  • pinch salt
  • ½ cup sugar
  • 2½ teaspoons cornstarch if using fresh berries, OR...
  • 1 tablespoon cornstarch if using frozen berries
  • 2 teaspoons fresh lemon juice
  • ROUGH PUFF DOUGH:
  • 2 cups all-purpose flour
  • ½ teaspoon salt
  • 1 cup (2 sticks) butter, cut into 1-inch cubes
  • ⅔ cups ice water
  • ASSEMBLY:
  • 1 egg white
  • Powdered sugar for dusting, or drizzle with a simple powdered sugar/water glaze
Instructions
  1. FILLING: In small pan, combine berries, sugar, and salt over medium heat, stirring continuously until mixture comes to a boil. Reduce heat to low and simmer for 5 minutes, stirring often.
  2. Pour or spoon approximately 1 tablespoon of the hot berry juice into a small cup or bowl and add the lemon juice. Stir. Slowly add cornstarch, stirring until smooth. If necessary, add a bit more berry juice.
  3. Whisk the cornstarch mixture into the berries and turn heat back to medium. Stir until the mixture thickens, 1-2 minutes. Remove from heat and allow filling to cool. (To cool quickly, place pan in shallow bowl of ice water.) Once cool, refrigerate until needed.
  4. PASTRY DOUGH:
  5. Place flour on work surface, stir in the salt, and drop the butter onto the flour.
  6. With a bench scraper or metal spatula, chop the butter and flour together until combined. Don't overwork the mixture - you want to see chunks of butter larger than peas.
  7. Begin drizzling the water over the mixture with one hand, while flipping and tossing it with the other. Again, don't over do it! It should be a crumbly mess at this point.Use your metal utensil to form the dough into a rough rectangle about 5"x 8".
  8. Roll out dough to approximately 6"x10", using the metal scraper to form straight edges. Keeping the short edge facing you, Flip the bottom edge up to the middle (it will be crumbly...just do the best you can) and the the top edge down to the bottom. This will create three equal sized layers. Give the dough a turn to the left, lightly flouring the surface if necessary to keep it from sticking, and repeat. Repeat 3 more times. Wrap snugly in plastic wrap and place in the refrigerator for at least 30 minutes. (It can be refrigerated for several days.)
  9. ASSEMBLY: If your dough has been refrigerated more than an hour, place it - still wrapped in plastic - on the counter to warm up for 20-30 minutes.
  10. Heat oven to 400 F. Cover two baking sheets with parchment.
  11. On lightly floured surface, follow the previous method and roll and fold it two more times. Add flour if necessary to keep the dough from sticking.
  12. Roll dough out into a rectangle that is approximately 14"x24". Using a round cutter that is the size of your potsticker press (about 4"), cut circles as close together as possible. As you work, stack the dough scraps on top of each other to keep the layers intact when you re-roll them.
  13. Whisk together the egg white and 1 teaspoon water.
  14. Lift one round at a time and place on the potsticker press. (Flour the potsticker press as needed.) With finger or pastry brush, spread a little egg white around the perimeter.
  15. Place 1 teaspoon filling in the center and fold the press over. Press firmly along the rounded edge for a good seal. (If you aren't using a press, fold the dough over the filling and press edges with fork.) Place on prepared baking sheet, keeping puffs at least ½" apart.
  16. You can roll the scraps one time. They won't be quite as flaky, but they're still very good! Cut remaining rounds and discard any scraps.
  17. Poke a fork in the center of each puff one time, brush lightly with egg white mixture, and bake for 18-20 minutes, or until golden brown.
  18. Use spatula to move puffs to a cooling rack. Dust with powdered sugar or drizzle with icing once the puffs are lukewarm.


Stir the berries and sugar together and bring to a boil.

Stir cornstarch mixture into the hot berries and cook until thickened.

Chop (don’t blend!) the cold butter into the flour.

Yup, it’s a little messy, but flip the flour with one hand while you drizzle water over it with the other. You can doooo it!

It’s going to look like this the first time you roll it. It’s okay. Really!

It’s a crumbly mess, but fold it into thirds. Just do your best!

See? It looks a lot better when you get to the third roll/fold.

Roll dough out thin and cut into 4-inch circles.

Re-roll your stack of scraps. Stacking them keeps the butter layers going in the right direction.

Add the filling. Not too much – about a teaspoon. Any more and it will really ooze out.

Poke each puff once with a fork and brush with egg white. Bake!

Drizzle or dust – either way is delicious.

Don’t let those bears get the upper hand here. Put on your hiking boots, strap a can of bear spray to your hip, and hit the woods for some wild mountain huckleberries. Those little gems are priceless indeed, and worth every single damn mosquito bite!

Lorinda

Wake Up and Get Moving Muffins

Very strong coffee, bran cereal, molasses, raisins (figs or dates are good too), apple and wheat flour are baked into these tender muffins. They will really wake you up and get you moving. You see where I’m going here, right? All puns and infantile jokes aside, these are really tasty muffins and better for you than a regular berry muffin with a mountain of streusel on top.

This recipe makes 24 muffins. You could cut it in half, but why would you? Wrap and freeze them for a quick on-the-go meal.

Wake Up and Get Moving Muffins
Print
Author:
Makes 2 dozen muffins (a few less if you use tall tulip liners). Wrap individually and freeze for a quick breakfast.
Ingredients
  • ¾ cup very strong hot coffee (I bring ½ cup freshly ground coffee and 1¼ cups water to a boil, let it simmer for a few minutes, and then put it through a fine strainer.)
  • ½ cup coconut oil (or butter, if you prefer)
  • 1 cup buttermilk
  • ¼ cup molasses
  • 2 eggs
  • 1 teaspoon vanilla
  • 2 cups All-Bran original cereal
  • 1½ cups all purpose white flour
  • 1 cup whole wheat flour
  • 2 teaspoons baking powder
  • 1 teaspoon baking soda
  • ½ teaspoon salt
  • 1 cup dark brown sugar
  • ½ teaspoon cinnamon
  • 1 tablespoon dark unsweetened cocoa (Optional. Mostly for color.)
  • 1 cup raisins (or chopped dates or figs)
  • 1 medium apple, grated (leave the skin on, but stop grating before you get to the core!)
  • butter and sparkling sugar if desired to add to the tops of warm muffins
Instructions
  1. Heat oven to 400 F.
  2. Prepare muffin pans by lining them with paper liners.
  3. Stir coconut oil (or butter, chunked into small pieces) into hot coffee until melted.
  4. Stir in buttermilk and molasses.
  5. Add eggs and vanilla and beat until completely combined.
  6. Add bran cereal and let it soak while you prepare the dry ingredients.
  7. In a large bowl, combine white flour, wheat flour, baking powder, baking soda, salt, brown sugar, cinnamon, and cocoa. Add raisins (or chopped dates or figs) and grated apple, and toss to coat.
  8. Pour liquid ingredients into bowl and fold or stir gently just until it is mostly incorporated. A few wisps of flour showing is fine. Do NOT overbeat.
  9. Spoon into prepared muffin liners, almost to the top. If you are using tall tulip-type liners, fill a little higher than the level of the pan.
  10. Bake standard size for approximately 16-18 minutes, or tall size for approximately 18-20 minutes, or until a toothpick comes out clean when inserted in the center of a muffin.
  11. Move the pan of muffins onto a cooling rack and, if desired, brush with soft butter and sprinkle with sparkling sugar or cinnamon sugar. Then remove from pan and set muffins on a rack to cool completely.

Ingredients. (The cocoa is mostly for color, so it’s optional.)

Make very strong coffee. I boil freshly ground beans and water, then put it through a fine sieve.

Combine all the liquids, add cereal, and let it soak for a few minutes.

Grate the apple, skin and all. (No core or seeds, of course.)

Toss raisins and apples in the dry ingredients

Stir gently until there are just a few wisps of flour in batter

Fill ’em up!

Brush with butter and sprinkle with sugar if desired. (You can see that I skipped the cocoa in this batch.)

Seriously, how can you resist this??

Love you, but gotta go now. Next up: green stuff for St. Paddy’s Day.

Lorinda


Bear Farts! (Huckleberry Doughnut Drops)

Bear Farts - The Rowdy Baker
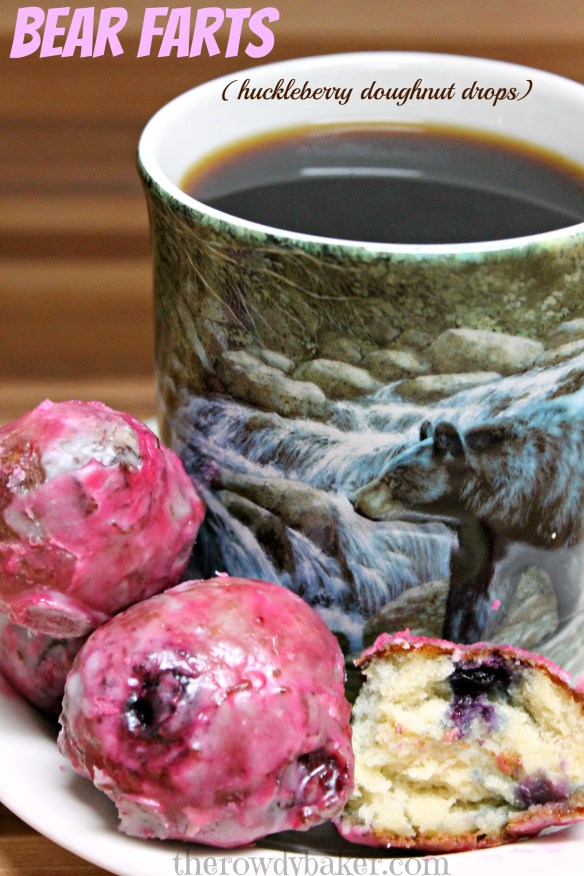
By now I should know better than to ask my husband to help me find a name for a new recipe; his sense of humor never evolved past fourth grade. But I have to admit, his suggestion made me laugh, and if you’ve ever wandered through the woods looking for huckleberries, you have probably seen lots of proof that bears found them first, and ate a ton of them!

To continue the bear theme with these delightful little cake doughnut drops, I made mine with honey instead of sugar. Buttermilk and a little fresh lemon are added for a touch of tang, but the huckleberries are really the star of the show.

Use fresh or frozen wild huckleberries, or small blueberries if you must. Expect to have a few escapees, as some will leap to their destruction in the hot oil. That’s a little distressing, since I know exactly how long and hard I have to pick to get a cup of berries, but the end result is worth the sacrifice. (Hint: Scoop those stray berries out of the oil between batches of Bear Farts. You don’t want them to cook into little black chunks that will stick to your lovely creations.)huckleberries aug 7 2016

These are very easy to make. Messing with the hot oil is the only time-consuming part of the recipe, but I’m just not crazy about baked doughnuts, so…I indulge in the real thing once in a while.

Oil is expensive. I use peanut oil (about $13.00 a gallon), and if I’m using my big stock pot it takes almost a gallon to get the oil deep enough. That’s a pricey batch of doughnuts! But you can use a smaller pan and just cook fewer doughnut drops at a time. You can also filter the used oil (cooled down, of course) through cheesecloth or a fine-mesh strainer and keep it in the refrigerator until you need it again.

Keep an eye on your thermometer and try to keep the oil at 350 F. If it gets hotter, the drops will get brown before the inside is done – not a good thing. Use a slotted spoon or spider to remove the doughnut drops, and layer them between paper towels to remove excess oil.

Remember, these aren’t light and airy like yeast doughnuts. They’re moist and dense, like…well…cake. Cake doughnuts are really best when they’re eaten fresh; they lose a little of their appeal by the next day. Eat ’em up!

Bear Farts! (Huckleberry Doughnut Drops)
Print
Author:
Makes about 48 doughnut drops. This can vary, depending on the size of your scoop.
Ingredients
  • 2 eggs
  • 1 cup buttermilk
  • 1 teaspoon vanilla
  • 4 tablespoons oil (I use peanut oil)
  • ¾ cup honey
  • zest and juice from one medium lemon
  • 4 cups all purpose flour
  • 3½ teaspoons baking powder
  • ½ teaspoon baking soda
  • ½ teaspoon salt
  • 1 cup huckleberries, divided (If using frozen berries, keep frozen until needed.)
  • 2 cups powdered sugar
  • oil for frying (peanut or canola work well)
Instructions
  1. In a small bowl, combine, eggs, buttermilk, vanilla, oil, honey, lemon zest, and lemon juice. Beat until frothy.
  2. In large bowl, combine flour, baking powder, baking soda, and salt.
  3. In a large pan or a deep fat fryer, add at least 2 inches of oil and a candy thermometer. Heat to 350 degrees.
  4. While oil is heating, gently stir ⅔ cup of berries into the dry ingredients. Add the liquid ingredients and stir JUST until combined.
  5. Once oil is the proper temperature, use a small cookie scoop (or two spoons - one to push the dough off the other) to drop small amounts of dough - about a rounded teaspoon full - into hot oil. They won't be perfectly round; shapes will vary wildly!
  6. BE VERY CAREFUL! Wear oven mitts and watch the temperature of your oil constantly. Try to keep it between 350 and (at the most) 375 F.
  7. Use a slotted spoon or spider to roll the doughnut drops over. When they are a rich brown, remove and layer between paper towels to drain.
  8. Place remaining ⅓ cup of huckleberries in a small pan on low heat with 1 teaspoon water. Cook, stirring (and mashing) occasionally, until berries are soft and have released their juice. Strain the juice into a small cup. Reserve the mashed berries for another use, like a smoothie or ice cream topping.
  9. Place powdered sugar in a small bowl and add huckleberry juice while stirring, until it creates a thin glaze. Roll warm doughnut drops in glaze and place on waxed paper or a cooling rack to dry.


Beat the liquid ingredients until frothy.

Beat the liquid ingredients until frothy.

Add berries to dry ingredients, then add liquids. Don't over-mix!

Add berries to dry ingredients, then add liquids. Don’t over-mix!

Use a scoop and drop it like it's hot!

Use a scoop and drop it like it’s hot!

Keep the temperature steady and let them get nice and brown on the outside.

Keep the temperature steady and let them get nice and brown on the outside.


Betcha can't eat just one!

Betcha can’t eat just one!

Bear Farts from The Rowdy Baker

Summer is waning, but I think I have a few more recipes in me before we all embrace the pumpkin and pecan frenzy. Peaches and plums, then pears and apples…lots of fun seasonal foods are still calling to me, and I’ll share!

Lorinda

Sausage Breakfast Strudel

Sausage Breakfast Strudel

My passion for baking usually revolves around sugar in some form, but occasionally I’m inspired to make something savory, and this strudel turned into my dream breakfast. Flaky dough surrounds a filling of sausage, cheese, eggs, and onions. Generous slices make a perfect Sunday breakfast!

I’m finding lots of uses for rough puff pastry – my new obsession – but this is my favorite so far. (I’m not tapped out yet, heaven help you.) The dough is much easier to make than traditional puff pastry or strudel dough, and can be made a day ahead, so breakfast will go together quickly. In fact, if you brown the sausage and onions and grate the cheese the night before, all you’ll have to do in the morning is roll out the dough, scramble the eggs, and assemble. Oh…and bake, of course.

The filling can always be modified to your preferences. Add mushrooms, spinach, green peppers, or diced cooked potatoes. More cheese, less cheese, even ham instead of sausage. This lovely dough can encompass any number of pleasant surprises!

Hint: if you’re adding anything juicy, like spinach or green peppers, sprinkle a generous layer of breadcrumbs over the cheese to help soak up excess liquid.

Sausage Breakfast Strudel - The Rowdy Baker


Sausage Breakfast Strudel
Print
Author:
This rich, savory breakfast strudel will serve 8. The dough and most of the ingredients can be prepared the night before.
Ingredients
  • DOUGH:
  • 2 cups flour
  • ½ teaspoon salt
  • 1 cup cold butter
  • ⅔ cup very cold water
  • FILLING:
  • 1 cup grated cheese of your choice (more to taste)
  • 2 pounds breakfast sausage, browned and pressed firmly between paper towels to remove grease.
  • 6 - 8 eggs, loosely scrambled (they will continue to cook in the oven)
  • ½ cup sliced green onions
  • 5 slices provolone cheese
  • ASSEMBLY:
  • ¼ cup melted butter
Instructions
  1. DOUGH:
  2. Cut 1 cup cold butter into pieces approximately 1-inch square.
  3. Place flour on work surface, stir in the salt, and drop the butter onto the flour.
  4. With a bench scraper or metal spatula, chop the butter and flour together until combined. Don't overwork the mixture - you want to see chunks of butter larger than peas.
  5. Begin drizzling the water over the mixture with one hand, while flipping and tossing it with the other. Again, don't over do it! It should be a crumbly mess at this point.Use your metal utensil to form the dough into a rough rectangle about 5"x 8".
  6. Roll out dough to approximately 6"x10", using the metal scraper to form straight edges. Keeping the short edge facing you, Flip the bottom edge up to the middle (it will be crumbly...just do the best you can) and the the top edge down to the bottom. This will create three equal sized layers. Give the dough a turn to the left, lightly flouring the surface if necessary to keep it from sticking, and repeat. Repeat 3 more times. Wrap snugly in plastic wrap and place in the refrigerator for 30 minutes. Make the filling while the dough chills, OR at this point you can leave the dough in the refrigerator until the next day if you prefer.
  7. ASSEMBLY:
  8. Heat oven to 400 F. Line baking sheet with parchment paper.
  9. Remove dough from refrigerator. Using the previous instructions, roll and fold two more times. (If you made the dough the day before, let the dough come to room temperature for 15 minutes first.)
  10. On a floured surface, roll dough as thinly as possible. Aim for 15"x18", with the short side facing you. Don't worry if your measurements aren't exact, but do make sure there's enough flour under the dough to keep it movable.
  11. Drizzle dough with half of the melted butter, spreading lightly with fingers or soft pastry brush.
  12. Beginning 3 inches inside the short edge facing you, and leaving 1 inch bare on either side, sprinkle the grated cheese from across the dough in a wide line.
  13. Cover the cheese in this order: sausage, scrambled eggs, green onions, slices of Provolone.
  14. Using a bench scraper or long metal spatula, lift the edge of dough facing you up and over the filling, as far as possible, and roll to the end.
  15. Pinch both ends and tuck under, pinching again. Carefully lift or slide onto parchment covered baking sheet, with seam side down.
  16. Coat with remaining melted butter and bake for 40-45 minutes, or until strudel is rich golden brown. Allow the strudel to cool for a few minutes before cutting it.

First, make the dough! (Don’t forget – this can be done the day before.)

Flour, salt, and butter - ready to chop-chop!

Flour, salt, and butter – ready to chop-chop!

Roughly chop together. Don't blend in the butter - chunks are what make it flaky!

Roughly chop together. Don’t blend in the butter – chunks are what make it flaky!

Fold like a book, with the open edge to your right. First fold is very rough. If it's pretty, you overworked it. It WILL come together!

Fold like a book, with the open edge to your right. First fold is very rough. If it’s pretty, you overworked it. It WILL come together!

Second fold is a little better

Second fold is a little better

After five folds, the dough is wrapped snugly and refrigerated for 30 minutes (or until the next day, if you’re the plan-ahead type).

Roll out the dough. Coat lightly with melted butter.

Fold two more times, and then roll out the dough. Coat lightly with melted butter.

Spoon sausage over a layer of grated cheese.

Spoon sausage over a layer of grated cheese.

Add scrambled eggs, onion, and slices of Provolone.

Add scrambled eggs, onion, and slices of Provolone.


Roll it up!

Roll it up!

Pinch the ends, tuck under, and place on parchment covered pan. Coat with melted butter.

Pinch the ends, tuck under, and place on parchment covered pan. Coat with melted butter.

And BAKE!

And BAKE!

I made this for just the two of us, and ended up freezing a huge portion of this for later. It’s rich and filling, and will easily serve eight people. Oh, and did I mention it’s scrumptious?

It is!

Lorinda

Sour Cream Apple Strudel

Sour Cream Apple Strudel - The Rowdy BakerWhile traditional strudel is fun and challenging to make (all that stretching), by far my favorite strudel to eat is kind of a cross between pie and strudel. The dough is made from “rough puff pastry”, (which is a quick and easy version of the much more complicated puff pastry dough) instead of classic strudel dough.

Compared to store bought puff pastry, rough puff pastry doesn’t puff quite as high, nor does it shatter as easily when you cut or bite into it.  I rolled my dough out very thin, which also reduced the puffiness, so it was the perfect dough to use for this recipe.

I wanted flaky, I wanted delicate, and I wanted just the right crust-to-filling ratio. Easy was a very nice bonus!

If you’re feeling motivated and want to play with stretchy dough, try my companion post, Classic Apple Strudel.

I’ve never been crazy about hot apples, especially when they’re in a sticky sauce like a traditional apple pie. I will, however, fight you for the last slice of sour cream apple pie because it’s so mellow and creamy – especially when it’s warm, with a big scoop of vanilla ice cream.

That was the flavor and texture I was shooting for, and was exactly what I got…on my very first try! I added some boozy, rum-soaked raisins and finely chopped pecans, and was thrilled with the results. The normally unflappable Mr. Rowdy was enthused – extremely enthused. He may have even thrown a “WOW WOW WOW!” in there as he inhaled half of the finished product.Bite of Sour Cream Apple Strudel - The Rowdy Baker

Tips:

  • If you want to serve this for breakfast, go ahead and make the dough the night before. Wrapped snugly in plastic, it will be waiting for you to roll it out, fill, and bake. (Let it sit at room temperature for 15 minutes or it will be a real bear to roll out!)
  • If you’d like to go for the glory and have even more layers, you can make 4-layer folds by folding each short end into the middle and the folding them together.
    For more layers, you can fold ends to meet in the middle...

    For more layers, you can fold ends to meet in the middle…

    ...then fold together, creating a 4 layer turn

    …then fold together, creating a 4 layer turn

Sour Cream Apple Strudel
Print
Author:
This strudel is made with a quick and easy homemade puff pastry. Filled with apples, sour cream, rum-soaked raisins, and toasted pecans, it will become a family favorite! Serves 8-10.
Ingredients
  • DOUGH:
  • 2 cups flour
  • ½ teaspoon salt
  • 1 cup cold butter
  • ⅔ cup very cold water
  • *****
  • FILLING:
  • ¼ cup raisins
  • ¼ cup rum (or use apple juice, if desired)
  • 3 large Granny Smith apples
  • ⅔ cup sour cream
  • 1 egg
  • 3 tablespoons flour
  • ¾ cup sugar
  • ½ teaspoon (more to taste) cinnamon
  • ¼ teaspoon salt
  • ½ cup toasted pecans (or walnuts), finely chopped
  • ***********
  • ASSEMBLY:
  • ¼ cup melted butter
  • ¼ cup plain breadcrumbs
Instructions
  1. DOUGH:
  2. Cut 1 cup cold butter into pieces approximately 1-inch square.
  3. Place flour on work surface, stir in the salt, and drop the butter onto the flour.
  4. With a bench scraper or metal spatula, chop the butter and flour together until combined. Don't overwork the mixture - you want to see chunks of butter larger than peas.
  5. Begin drizzling the water over the mixture with one hand, while flipping and tossing it with the other. Again, don't over do it! It should be a crumbly mess at this point.Use your metal utensil to form the dough into a rough rectangle about 5"x 8".
  6. Roll out dough to approximately 6"x10", using the metal scraper to form straight edges. Keeping the short edge facing you, Flip the bottom edge up to the middle (it will be crumbly...just do the best you can) and the the top edge down to the bottom. This will create three equal sized layers. Give the dough a turn to the left, lightly flouring the surface if necessary to keep it from sticking, and repeat. Repeat 3 more times. Wrap snugly in plastic wrap and place in the refrigerator for 30 minutes. Make filling while the dough chills.
  7. FILLING:
  8. Place raisins in small pan with rum over medium heat. When rum is just beginning to bubble, Remove from heat and let sit uncovered.
  9. Peel and core apples. Cut into eighths and slice thinly crosswise, making small thin pieces. You should have approximately 4 cups.
  10. In a large bowl, combine apples, raisins (including the excess rum) and remaining filling ingredients. Stir until apples are coated.
  11. ASSEMBLY:
  12. Remove dough from refrigerator. Using the previous instructions, roll and fold two more times.
  13. On a floured surface, roll dough as thinly as possible. Aim for 14"x20", with the long side facing you. Don't worry if your measurements aren't exact, but do make sure there's enough flour under the dough to keep it movable.
  14. Brush the surface lightly with melted butter, using a paper towel or pastry brush.
  15. Beginning 2 inches inside the long edge facing you, distribute the bread crumbs in a thick line all the way across, leaving an inch of plain dough on each side.
  16. Pile the apple mixture evenly over the bread crumbs. (The crumbs will help soak up extra moisture.) If your apples were really juicy, you may need to use your judgment and remove a little of the juice from the bowl.
  17. With your scraper or spatula, lift the long edge to cover as much of the apples as possible. Roll the strudel, using the scraper to lift under the dough and inch it along.
  18. Pinch the ends well. Roll the strudel onto a piece of parchment paper, and use the paper to lift the strudel onto a baking sheet. Curve into a half-circle if needed to fit into the pan.
  19. Brush with melted butter and place in the refrigerator for 30 minutes.
  20. Heat oven to 400 F.
  21. Bake strudel for approximately 40 minutes, or until rich golden brown.
  22. Remove to a rack and mark the pieces with a serrated knife, just through the top. This will allow a little of the steam to escape and keep it crisp. Serve warm with whipped cream or vanilla ice cream.
Flour, salt, and butter - ready to chop-chop!

Flour, salt, and butter – ready to chop-chop!

Roughly chop together. Don't blend in the butter - small chunks are what make it flaky!

Roughly chop together. Don’t blend in the butter – chunks are what make it flaky!

First fold is pretty rough. If it's pretty, you overworked it. It WILL come together!

First fold is pretty rough. If it’s pretty, you overworked it. It WILL come together!

Second fold is a little better

Second fold is a little better

After five folds and a cold nap, fold two more times and then roll it out nice and thin

After five folds and a cold nap, fold a couple more times and then roll it out nice and thin

Use a scraper or spatula to help roll the dough

Use a scraper or spatula to help roll the dough

Pinch the ends and shape it to fit the pan

Pinch the ends and shape it to fit the pan

Score the baked strudel and let it cool a bit before cutting

Score the baked strudel and let it cool a bit before cutting

Dig in!

Dig in!

Oh, man. You are going to love, love, love this! Eat it while it’s warm, or soon thereafter; it gets a little soft by the second day. Since there is sour cream in the filling, make sure any leftover strudel gets wrapped and put in the fridge.

I’ll leave you with a quote from S.J. Perelman:

“I have no truck with lettuce, cabbage, and similar chlorophyll. Any dietitian will tell you that a running foot of apple strudel contains four times the vitamins of a bushel of beans.”

I’ll buy that!

Lorinda


Classic Apple Strudel

Classic Apple Strudel - The Rowdy Baker


Are you ready to do this? There will be no frozen puff pastry for this recipe – no sir! We’re going to pull our hair back, put our big white voluminous aprons on, and do it the old-fashioned way today!

I’m warning you, though…I’m going to get pretty wordy, because I learned a lot, failed a lot, and have some ‘splainin’ to do.

The other day, my husband came into the kitchen while I was running the mixer and asked me what I was making. I looked him right in the eye but didn’t say a word. He just whispered: “noooooo”.  Poor man. Uh huh – another strudel. Obsessive, stubborn, tenacious – whatever you want to call me, I simply refuse to let a blob of dough get the best of me.

After being inspired by an apple strudel video on Facebook, I immediately began looking at recipes and videos. I had never made strudel before; in fact, I’m not sure I had even eaten a piece of strudel. But…I had to do this. I was compelled to do this…because it just looked like so much fun.

(Cue the creepy music that always starts when the girl heads down to the basement because she heard a noise, and even though everyone in the room is screaming: “Don’t do it!”, she does anyhow because she just has to.  Yeah, that.)

Seriously, I had a blast stretching the dough and fully expected the beautiful, fragrant, finished pastry to melt in my mouth, but it was…well…kind of tough on the bottom and more like a shell on the top.

I assumed a strudel would be light and flaky, like those frozen toaster strudels. Mine? Not so much.

So I tried:

  1. nuts instead of breadcrumbs when rolling it up.
  2. more butter brushed onto the dough.
  3. butter instead of oil in the dough.
  4. throwing the dough against the counter 100 times as suggested to activate the gluten strands.
  5. chilling the rolled strudel before baking.
  6. A richer dough, using milk and eggs

I tried higher temps, lower temps, letting the dough rest longer before stretching. I finally achieved a modest amount of flakiness (whew) and an enthusiastic response from my guinea pigs book club with the version I’m going to post, but I’ve come to a conclusion: the problem wasn’t with the dough, it was with my expectations. After asking around, I think I highly overestimated how light and delicate strudel should be. I mean, this dough has been mixed, pounded on the counter, and stretched within an inch of its life. It’s gotta be pretty tough to withstand that, right?

Don’t get me wrong, it really is good – very good. If you want to have the fun of stretching out this dough and making a traditional dish, and can promise me you aren’t expecting puff pastry, this recipe is for you!

(Oh, and if you have your heart set on a very light pastry, check out my companion post, Sour Cream Apple Strudel . The dough has a lot more butter in it, and is made with a “rough puff pastry” dough, similar to puff pastry but a little more restrained. You will just miss out on the dough stretching fun.)

A random hint:

You know that moment when you sniff the air and say to yourself: “what am I smelling?” and then you remember you left raisins and rum on the burner and forgot about them? NO?? Well…I do. I suggest you watch the raisins until you see the liquid begin to bubble – then remove the pan and set it aside until completely cool. Because you don’t want to see (or smell) this:

Burnt raisins and wasted rum.

Burnt raisins and wasted rum.

Since I have a nice, sturdy Bosch mixer that can really work the dough, I skipped the recommendations for hand kneading and throwing the dough onto the counter to activate the gluten strands. I figured it got enough of a workout. If you are doing this by hand though, or just want to get your aggression out by manhandling the dough, knock yourself out! It’s kind of fun.

I can’t really credit one recipe – my version is a conglomeration of many that I found. In fact, I tried so many variations that my recipe notes look like THIS!! And this is just the first page. My final conclusion was that the simpler recipes (no egg, no milk) worked better for me, and melted butter in place of the oil gave me the nicest pastry.

Clear as mud

Clear as mud


To make an old fashioned strudel, you’ll need a table or kitchen island that you can maneuver around (at least 2’x3′) and a large piece of clean cotton fabric. A sheet works well. You are going to be stretching a tiny ball of dough into a surprisingly large, paper-thin sheet of dough, and the best way to do this is on fabric. When you’re ready to roll it, the fabric will be your best friend. Trust me.

I also tried a different filling just for fun, combining blueberries, lemon, and apples. I’ll share that recipe at the bottom of the post if you’re interested. That’s the strudel the gals at my book club tested and liked. Here’s a mouthwatering photo of it:Blueberry Apple Strudel from The Rowdy Baker

The most important thing I learned during my immersion into all things strudel was this: don’t make a strudel when you’re in a hurry or feeling pressured. Fast, jerky movements create holes in the dough, and while a few holes aren’t a big deal (they won’t show when the strudel is rolled up) it’s better to go to your happy place and take your sweet time. The act of stretching the dough should be a pleasurable experience, not something to be rushed through.

Ready? Here we go!

Classic Apple Strudel
Print
Author:
This classic strudel is filled with tender apples, rum-soaked raisins, and nuts. Serves 10.
Ingredients
  • DOUGH:
  • 2 cups flour
  • 1 tablespoon sugar
  • ½ teaspoon salt
  • 3 tablespoons melted butter
  • 1 teaspoon vinegar
  • ⅔ cup room temperature water
  • oil to coat dough
  • ******
  • FILLING:
  • ¼ cup raisins
  • ¼ cup rum (or apple juice)
  • 5 cups of peeled, cored, and chopped Granny Smith Apples
  • 1 small lemon (juice and zest)
  • ½ cup finely chopped walnuts
  • 1 teaspoon cinnamon
  • ¼ teaspoon salt
  • ⅔ cup sugar
  • *****
  • FOR ASSEMBLY:
  • 1½ cup breadcrumbs* (See Instructions)
  • 6 tablespoons melted butter
  • ½ cup finely chopped or ground walnuts (optional)
Instructions
  1. DOUGH:
  2. In large bowl, combine flour, sugar, salt, butter, and vinegar. Slowly pour in while stirring, until well mixed.
  3. Knead by machine for 5 minutes, or by hand for 8 minutes. Dough should be soft and elastic, and slightly tacky. Repeatedly throw the dough against a hard surface for a minute or so to help the gluten develop. Form into a ball, generously coat with oil, and cover with plastic. Allow dough to rest (very important) for 1 hour.
  4. Once dough has rested, combine the chopped apples with lemon in a large bowl and set aside. Cover a table with a clean cotton sheet or tablecloth, and sprinkle with flour. Rub the flour into the fabric. Place dough on cloth and form into a rectangle. Using a rolling pin, roll dough out as thinly as you can.
  5. Using your hands, begin stretching the dough. Work slowly, lifting edges and pulling. Slide your hands under the dough and coax it thinner and thinner. Two people can make this go a lot easier, with both reaching into the middle from opposite sides and easing the dough outwards. The goal is to get a paper thin dough, approximately 24"x30", but I stop when the dough seems consistently thin and small holes are beginning to develop.
  6. Trim the thick edges away with a pizza cutter or scissors, and brush the top of the dough with melted butter. The easiest way I've found is to use a paper towel to lightly spread the butter.
  7. Sprinkle with 1 cup of fine breadcrumbs and ½ cup finely chopped nuts. (Nuts are optional.)
  8. With one of the short sides facing you, pour the remaining bread crumbs from one side to the other, leaving about 2 inches of plain dough closest to you (to help begin the rolling process) and about 1 inch of plain dough on either side .
  9. Add remaining filling ingredients to the apples and spoon evenly over the breadcrumbs.
  10. Using the cloth, lift the plain dough edge over the apples and roll to the end. Roll the strudel onto a piece of parchment, and use this to lift it onto a baking sheet. You may need to give it a curved shape to fit the pan.
  11. Pinch the ends firmly and tuck under the strudel. Brush generously with butter, and put in the refrigerator to chill for 45 minutes. This will let the butter firm up, helping to create flaky layers.
  12. Heat oven to 400 F. Bake for approximately 40 minutes, or until the pastry is a rich golden brown.
  13. Score the top where the strudel will be cut, to allow some of the steam to escape, and sprinkle the top with powdered sugar. Cool until just warm, and serve with whipped cream or vanilla ice cream.
  14. *Breadcrumbs: You can use commercial crumbs, but for more taste, crumble 2 cups of stale bread and toss with 1 tablespoon melted butter. Bake at 375 F for 10 minutes. Crush into fine crumbs.

The dough is so soft and stretchy after its little nap!

Dough, ready to roll and stretch!

Dough, ready to roll and stretch!

Use a rolling pin to get it as thin as you can before you start stretching. Make sure to rub flour into the cotton fabric on the table.

Roll dough out on floured fabric.

Roll dough out on floured fabric.

Start stretching. Move slowly but don’t be afraid of the dough! I like to use the palms of my hands and sort of “tickle” the dough from the center outwards. You’ll find what works for you. Two people, one on each side of the dough, can really get the job done.

Stretch it very thin!

Stretch it very thin!

Regardless of the size, I stop when I start seeing little holes. Just trim to remove thick edges and get ready to roll!

Ready to fill and roll.

Ready to fill and roll.

Butter the dough gently. A pastry brush is too rough, so I use a piece of paper towel. You can just sprinkle it on too, if you’d like. It’s not critical to cover every inch of the dough – just do the best you can.

I use a paper towel to spread the butter. You can just sprinkle it on if you prefer.

I use a paper towel to spread the butter. You can just sprinkle it on if you prefer.

Now mix together the filling. I chop or slice my apples before rolling, and toss them with the lemon to keep them from browning, but don’t add the sugar until the last minute or you’ll end up with a whole lot of juice.

Mix together the filling ingredients just before rolling.

Mix together the filling ingredients just before rolling.

The butter and the crumbs help define the layers. I tried doing without this step, and it was definitely not as flaky.

Buttered dough, sprinkled with breadcrumbs & nuts. Apple filling is arranged on bed of breadcrumbs.

Buttered dough, sprinkled with breadcrumbs & nuts. Apple filling is arranged on bed of breadcrumbs.

The cloth will help you roll the strudel. this part’s so easy; once you get it started, it just rolls itself!

Use the cloth to lift and roll the strudel.

Use the cloth to lift and roll the strudel.

Coat it with melted butter and put it back in the fridge for 45 minutes. You can skip this step, but chilling the butter between the layers really helps the texture.

Brush the strudel with melted butter

Brush the strudel with melted butter

Once baked, score through the top with a serrated blade to release extra steam. Don’t cut the strudel until it has cooled a bit. It will soften slightly, which is what you want.

Score the baked strudel and let it cool a bit before cutting

Score the baked strudel and let it cool a bit before cutting

Apple Strudel

And now, as if this post wasn’t long enough, I’ll give you instructions for making the blueberry apple filling.

For a thickening agent I used Agar (or agar-agar). If you’ve never used it before, I think you’ll be surprised by how easy and dependable it is.. It produces a slightly gelatin-like result, with no taste or funny texture. Agar is available through most health-food stores and Asian markets, or can be purchased online.

BLUEBERRY APPLE FILLING

4 cups frozen blueberries
1 cup sugar
2 tablespoons fresh lemon juice (1 lemon)
1/4 teaspoon salt
1 teaspoon agar powder (not flakes)
2 cups finely chopped apples
1 cup chopped walnuts

*In a large pan over medium-low heat, stir together the blueberries, sugar, lemon juice, and salt. Heat, stirring often, until berries begin to release juice. Raise heat to medium and bring to a low boil. Sprinkle with agar powder and cook for 2 minutes, stirring constantly.
*Remove from heat and stir in apples.
*Once mixture has cooled, stir in the walnuts. Place in the refrigerator until thickened and use as you would apple filling.

NOTE: Don’t be alarmed if it gets very thick and gelatin-like. It will soften and melt once it’s baked in your streudel dough!

Remember that baking should be an adventure. New ideas, new techniques, and new experiences – that’s what it’s all about!
Lorinda

Sour Cream Apple Muffins

Sour Cream Apple Muffins - The Rowdy BakerI baked a Sour Cream Apple Pie for dessert last week and it reminded me of a muffin my son and I created a long, long time ago. Of course, that recipe has long since disappeared, but I think I’ve managed to come close to our original concept.

There were some changes made to my basic muffin recipe, since I wanted them to be rich (butter instead of oil), yet light and fluffy (cake flour instead of all-purpose). I also used tulip muffin liners because it gives you more room to PILE ON the streusel topping.

Pile on the streusel!

Pile on the streusel!

There is cinnamon in the streusel, and a little in the muffins, but the important flavor – the flavor that makes these taste just like my favorite pie – is nutmeg. I was pretty generous with it, so if you’re not as fond of nutmeg as I, you may want to cut the amount in half.

The fragrance is out of this world, and they’re good either hot out of the oven or room temperature.Sour Cream Apple Muffins from The Rowdy Baker

You’ll get 12 tall muffins from this recipe if you use tulip liners. If you want to use regular muffin liners, fill them 2/3 full and then add streusel to the top. You should get approximately 16-18 muffins that way. There will also be some muffin-top action happening, so grease the top of the pan lightly so the streusel won’t stick.

Sour Cream Apple Muffins
Print
Author:
Makes 12 muffins (using tulip muffin liners) or 16-18 muffins using regular liners.
Ingredients
  • STREUSEL TOPPING:
  • 1 cup white sugar
  • 1 cup flour (all-purpose is best, but cake flour works too.)
  • 2 teaspoons cinnamon
  • ¼ teaspoon salt
  • 7 tablespoons melted butter (1 stick, minus one tablespoon)
  • MUFFINS:
  • 2 cups cake flour
  • 1 cup sugar
  • 1 teaspoon baking powder
  • 1 teaspoon baking soda
  • ½ teaspoon salt
  • ½ teaspoon nutmeg (more or less to taste)
  • 1 tart apple, peeled, cored, and chopped into small pieces (I use Granny Smith)
  • 1 teaspoon cinnamon
  • 1 tablespoon sugar
  • 6 tablespoons melted butter
  • 2 eggs
  • 1 cup sour cream
  • 2 tablespoons milk
  • 1 teaspoon vanilla
Instructions
  1. Heat oven to 375 F. Place 12 paper tulip-shaped liners in muffin pans. (If you are using regular liners, you will need two pans, as there will be 15-18 muffins.)
  2. In a small bowl, combine all of the streusel ingredients. Stir with a fork until combined, and set aside.
  3. In a large bowl, sift together twice: flour, 1 cup sugar, baking powder, soda, salt, and nutmeg.
  4. In a small bowl, toss the chopped apple with 1 cinnamon and 1 tablespoon sugar. Add to dry ingredients, folding in carefully. Don't put that bowl in the sink...use for the next step!
  5. Whisk together melted butter, eggs, sour cream, milk, and vanilla. Fold gently into the dry ingredients, being very careful not to stir, just until most of the flour is incorporated - you should be able to see a few wisps of flour.
  6. Divide between 12 tulip liners. (If you are using regular liners, fill approximately ⅔ full.)
  7. Break the streusel up with a fork and sprinkle over muffin batter. Use it up! Trust me - there's no such thing as too much streusel!
  8. Bake for approximately 22 minutes, or until a toothpick inserted into the middle of one of the muffins comes out clean.
  9. Cool on a rack for 5 minutes, then remove cupcakes from pan to cool completely.

Here's what you'll need.

Here’s what you’ll need.

Sift together the dry ingredients...twice!

Sift together the dry ingredients…twice!

Coat the chopped apples in cinnamon sugar

Coat the chopped apples in cinnamon sugar.

Gently toss apples in flour mixture.

Gently toss apples in flour mixture.

Add the liquids, and very gently fold in. A few wisps of flour showing is just fine!

Add the liquids, and very gently fold in. A few wisps of flour showing is just fine!

Spoon batter into liners and cover with streusel.

Spoon batter into liners and cover with streusel. More streusel than this!!!

Smother the muffin batter with streusel!

Smother the muffin batter with streusel!

Sour Cream Apple Muffins - From The Rowdy Baker

  • A soft, light texture
  • Al dente, tangy apple chunks
  • Crisp, sweet, crumbly topping

Breakfast just doesn’t get any better than this!

And believe it or not, even though there are quite a few ingredients, I can have these ready for the oven in 20 minutes; you can too!

Lorinda

Maple Streusel Rollups

Maple Streusel Rollups from The Rowdy BakerI guess it’s time to admit it: I think I need an intervention. This maple addiction has gotten completely out of control. I’ve replaced a lot of my processed sugar with maple sugar, and have developed a love affair (in moderation, of course) with maple whiskey. Pure maple syrup is my go-to sweetener for cereal and tea, though I add a little Mapleine to it for  more maple kick. Yep…I have it BAD!

Today I made Maple Streusel Rollups, which my husband said were “the best thing I’ve made in a long time”. There you have it, folks. You just have to make these!

I started with the recipe that I use for Maple Bars and Cinnamon Rolls,  but made it a wee bit richer with the addition of butter and buttermilk, and sprinkled maple sugar on the dough before rolling. Then I covered the raised rolls with streusel and drizzled the baked rolls with rich maple icing.

Do I have your attention yet?  If not, just look at THIS!roll


Light, fluffy, sweet and mapley (I’m pretty sure that’s a real word), and topped with a crunch pecan streusel, drizzled with a serious maple icing.

Oh.My.Word.

Here you go:

Maple Streusel Rollups
Print
Author:
Makes 24 rolls.
Ingredients
  • ¾ cup milk (I use whole milk)
  • ¼ cup shortening
  • ¼ cup butter
  • ½ teaspoon cinnamon
  • ¾ cup buttermilk
  • ⅓ cup very warm water
  • 2 packages active dry yeast
  • ½ teaspoon sugar
  • 2 eggs
  • ⅓ cup sugar
  • 1½ teaspoons salt
  • 5½ cups all-purpose flour
  • FILLING:
  • ½ cup very soft butter (almost melted)
  • ½ cup maple sugar (or ½ cup white sugar plus ½ teaspoon maple extract)
  • ½ cup brown sugar
  • STREUSEL TOPPING:
  • ½ cup brown sugar
  • ½ cup flour
  • 4 tablespoons melted butter
  • ⅓ cup finely chopped pecans (I toast mine first, but you don't have to)
  • ICING:
  • 2 cups powdered sugar
  • 2 tablespoons melted butter
  • 2 teaspoons maple extract (I use Mapleine)
  • 1 tablespoon milk (more if necessary)
Instructions
  1. In a small pan on medium low heat, combine the milk, shortening, butter and cinnamon. Heat until shortening and butter are melted. Remove from heat and stir in the buttermilk. Set aside.
  2. In a small bowl or ramekin, combine the warm water, yeast, and ½ teaspoon sugar. Allow the mixture to sit until bubbly (about 5 minutes).
  3. In a large bowl, preferably using a stand mixer, combine the milk mixture, yeast mixture, eggs, and ⅓ cup sugar. If using a stand mixer, switch to a dough hook.
  4. Slowly add flour and salt and knead by beating on low for 5 minutes. Dough should come cleanly away from sides of bowl, but still be slightly sticky. (If kneading by hand, knead for 7 minutes on floured surface.)
  5. Place dough in greased bowl and allow to rise until double - about 1 hour.
  6. Prepare a large 11x15-inch pan by either lining with parchment or spraying with an oil/flour mixture like Baker's Joy.
  7. Punch down dough and divide in half.
  8. Working with one half at a time, roll out on parchment (or lightly floured surface) to a 15x9-inch rectangle, with the long side facing you.
  9. Spread half of the butter (1/4 cup) on surface of dough and sprinkle with half of the sugar. Roll snugly.
  10. Cut roll into 12 pieces. and place in prepared pan, filling half of the pan. Repeat with the other half of the dough.
  11. Cover with a clean dishtowel or plastic wrap, and allow the rolls to rise until almost double.
  12. Heat oven to 400 F.
  13. Combine the streusel ingredients in a small bowl. Taste a spoonful (optional...just thought you might want permission to indulge) and sprinkle over the raised rolls.
  14. Bake for 20-25 minutes, or until the streusel is a browned - then remove from oven and place on rack to cool.
  15. While slightly warm, combine the ingredients for the icing in a small bowl and spoon icing into a piping bag or a plastic zipper bag with one corner snipped off. Drizzle over the top of the streusel.
  16. Serve!

Add buttermilk to heated mixture.

Add buttermilk to heated mixture.

Yeast mixture should be bubbly.

Yeast mixture should be bubbly.

The dough comes cleanly away from sides of bowl, but is still slightly sticky.

The dough comes cleanly away from sides of bowl, but is still slightly sticky.

Punch down the dough.

Punch down the dough.

Add maple sweetness and roll!

Add maple sweetness and roll!

Slice...

Slice…

Sprinkle risen rolls with streusel.

Sprinkle risen rolls with streusel.

Drizzle the baked rolls with icing.

Drizzle the baked rolls with icing.

This is where I should tell you I’m through with maple recipes for a while…but I’m not. I have another idea I’ve been playing with – not with great success – but it’s given me an idea. A mapley idea.

Oh, and if maple isn’t your thing, I AM working on a savory, hearty dish for the Super Bowl. Come back – please come back.

Lorinda

My Kinda Bars


My Kinda Bars watermark verticalThis relentless sweet tooth of mine has discovered the thrill of a snack that’s actually pretty healthy! I love Kind bars, but find it hard to fork over the money for them, so of course I had to try to make my own.

I tried lots of different methods, but ultimately (of course) went with the one that had the most steps. It just turned out so much better it was worth the extra time. By tossing my nuts and cereal in boiled syrup and then baking it like caramel corn, the bars glued together perfectly and didn’t have a pool of crunchy sugar on the bottom.

Not that I have anything against a layer of crunchy sugar…but you might.

I used honey and pure organic maple syrup when making these, since both are a little lower on the glycemic index than processed sugar. If you’re watching your sugar intake and want to go lower, you can substitute brown rice syrup for the maple syrup. I’ll be making them with maple sugar soon, but realize that not everyone has easy access to that – so this was my compromise.

Nuts, raisins, and puffed rice are held together with just enough sweet syrup to do the job. That’s it! I think these are perfect for those moments when you are in a rush and have to grab and go; you’ll be amazed by how satisfying and filling they are.My Kinda Bars watermark hoirz

Oh, and in case you make these and think that hiding them in the freezer will keep you from munching uncontrollably, fuhgeddaboudit. They’re delicious frozen. I know this.

This particular recipe is for maple Kinda bars. If you are using a maple flavoring like Mapleine, you may be able to cut the amount of flavoring back to one tablespoon, but I used pure maple extract, which doesn’t seem to be as strong, so it took two tablespoons for a mild maple flavor.

Adjust these any way you like, as long as you keep the basic ratio of four cups of nuts to two cups of cereal. Cashews are very good, as are hazelnuts (if you like them.) I’m not a fan.

Hints:

  • If you don’t love maple, use vanilla instead. A dash of cinnamon is nice, too.
  • I have a distrust of parchment, so I butter mine before pressing the mixture into the pan, just for insurance. If you have more faith than I, you can skip that step.
  • Press the mixture into the pan firmly. One way is to place a piece of parchment over the top and press with your hand. If you aren’t willing to risk pain, you might want to wait a few minutes for it to cool down.
  • Cut when the bars are solid but still slightly warm. This will keep them from crumbling at the edges.
My Kinda Bars
Print
Author:
Yields 18 bars measuring approximately 1½-inches by 4½-inches or 27 bars measuring approximately 1½-inches by 3 inches.
Ingredients
  • 1½ cups chopped almonds
  • 1½ cups chopped walnuts
  • 1 cup chopped pecans
  • 2 cups chopped unsweetened rice puff cereal (not krispy cereal...puffed.)
  • ½ cup raisins
  • ⅓ cup honey
  • ⅓ cup pure maple syrup (or brown rice syrup)
  • 1 tablespoon coconut oil (more for greasing baking pan)
  • ¼ teaspoon salt
  • 2 tablespoons pure maple extract (or 1-2 tablespoons maple flavoring like Mapleine.)
  • ¼ teaspoon baking soda
Instructions
  1. Heat oven to 250 F.
  2. Prepare a large rimmed baking pan or cake pan by greasing with coconut oil. Prepare a 9X13 baking pan by lining with buttered (or you may use coconut oil) parchment.
  3. In a large bowl, combine the nuts, raisins, and cereal.
  4. In a medium pan on medium heat, bring the honey, maple syrup, coconut oil, and salt to a boil. Turn down slightly to maintain a gentle boil and cook for 4 minutes, stirring occasionally.
  5. Remove from heat and stir until the bubbles are gone. Add the flavoring and baking soda and stir briskly.
  6. Pour hot mixture over nuts and cereal in the bowl and stir until combined.
  7. Pour into the large greased pan and bake for 45 minutes, stirring every 15 minutes.
  8. Spread baked mixture into parchment-lined pan and press firmly. You may want to cover with a sheet of parchment and press again with your hands.
  9. Cool until solid but still slightly warm. Lift out, using parchment, and cut into strips.
  10. Store in an airtight container, layered with waxed paper or parchment. These freeze well, too!
Chopped rice puffs help the bars hold together better.

Chopped rice puffs help the bars hold together better.

Combine chopped nuts, raisins, and rice puffs.

Combine chopped nuts, raisins, and rice puffs.

Use the good stuff! (Or brown rice syrup if you prefer.)

Use the good stuff! (Or brown rice syrup if you prefer.)

Cook the syrup.

Cook the syrup.

Lightly spoon into greased baking pan and bake.

Lightly spoon into greased baking pan and bake.

Press firmly (!) into lined pan.

Press firmly (!) into lined pan.

Cut into bars - whichever size you prefer.

Cut into bars – whichever size you prefer.

My Kinda Bars very close watermarked

If you know me at all, you know that my mind is already going a million miles an hour, thinking of variations that I would love.

  • Peanuts, almonds, and raisins drizzled with dark chocolate.
  • Pumpkin seeds, pecans, walnuts, dates, and pumpkin pie spice (with a handful of oats perhaps?)
  • Cashews, almonds, pecans, with a cup of dark chocolate covered raisins stirred into the baked mixture before it’s pressed into the pan.

I’m certain you have some great ideas, and I’d sure love to hear them!

Lorinda

Huckleberry Buttermilk Scones


Huckleberry Scones watermarked


Huckleberry season came early this year in Eastern Washington, taking us a little bit by surprise. We missed the best picking but still came away with a couple of gallons of these precious gems.huckleberries july 16

If you’ve ever gone huckleberry picking, you’ll understand why I’m a sort of stingy with them. The three “B”s (bending, bees, and bears) make huckleberry picking a real labor of love. I make a small batch of jam each year, then usually just throw a handful into pancakes, muffins, cakes and breads.

As much as I love huckleberry pie, it’s hard for me to part with that many berries in one fell swoop. I like pie, but seriously? I’d rather turn those berries into margaritas! Mmmm….margaritas. Ahem. ‘Scuse me…I’ll be right back.

*Hic*

With just one cup of frozen huckleberries, you can make eight large (or twelve small) light, fluffy, buttermilk scones. Add a little huckleberry icing to drizzle over the top, and you’ll have all the wonderful huckleberry flavor you could want.

Huckleberry Buttermilk Scones
Print
Author:
Makes 8 large or 12 regular scones. Blueberries may be substituted for huckleberries if you wish. Make sure to use frozen berries!
Ingredients
  • 2⅓ cups all-purpose flour
  • ⅓ cup sugar
  • ½ teaspoon baking soda
  • 1 Tablespoon baking powder
  • ⅛ teaspoon salt (if using unsalted butter, increase salt to ¼ teaspoon)
  • ½ cup (1 stick) cold butter
  • ¾ cup buttermilk
  • 1 egg
  • 1 teaspoon vanilla
  • juice and zest of one small lemon (approximately 1 tablespoon juice)
  • 1 cup frozen huckleberries
Instructions
  1. Heat oven to 425 F.
  2. Place a piece of parchment on baking sheet. (Or lightly grease)
  3. In a large bowl, sift the flour, sugar, baking soda, baking powder, and salt.
  4. Grate the cold butter using a large-holed grater, and work the butter into the dry ingredients, using a pastry blender or your fingers. Make sure there are no large lumps of butter.
  5. Toss the frozen huckleberries in the flour mixture and set aside.
  6. In a glass measuring cup or small bowl, beat the buttermilk, egg, vanilla, lemon juice, and zest until well combined and frothy.
  7. Make a well in the dry ingredients and add the liquid ingredients. Stir just until combined. Don't over stir.
  8. Spoon dough onto a floured surface and turn to coat. Don't knead the dough - just gather it into a ball and make sure the outside is covered with flour.
  9. *For 8 large scones: Pat into a flat circle about the size of your hand. Move to the parchment covered baking sheet. Gently flatten into a circle approximately 1-inch thick. Brush lightly with buttermilk and sprinkle with sugar, if desired.With a sharp, floured knife, cut into 8 wedges, lifting the knife straight up with each cut. Using a metal spatula, pull each wedge out slightly to leave a little space between each one. Bake for approximately 18-20 minutes, or until golden brown.
  10. *For 12 regular scones: Divide the dough into two pieces. Gently form each half into a ball and pat into 4-inch circles. Place on parchment covered baking sheet and gently flatten into circles about ¾-inch thick. Brush lightly with buttermilk and sprinkle with sugar, if desired. With a sharp, floured knife, cut each circle into 6 wedges, lifting the knife straight up with each cut. Using a metal spatula, pull each wedge out slightly to leave a little space between each one. Bake for approximately 16-18 minutes, or until golden brown.
  11. Move pan to a cooling rack and allow the scones to cool on the pan.
  12. Drizzle slightly warm scones with confectioners glaze. (Or add a little huckleberry jam or lemon juice to the glaze for more flavor.)
Here's what you'll need.

Here’s what you’ll need.

Grate COLD butter.

Grate COLD butter.

Toss the berries in the flour mixture.

Toss the berries in the flour mixture.

Lightly beat the liquids.

Lightly beat the liquids.

Mix liquids and dry ingredients. Easy, Tiger. Just barely combine them.

Mix liquids and dry ingredients. Easy, Tiger. Just barely combine them.

Coat dough with flour.

Coat dough with flour.

Flatten on baking sheet. Brush with buttermilk and sprinkle with sugar.

Flatten on baking sheet. Brush with buttermilk and sprinkle with sugar.

Cut into wedges. Separate slightly. Bake!

Cut into wedges. Separate slightly. Bake!


scones vertical

You can leave these plain or drizzle them with confectioners icing. I added a little huckleberry jam to mine to give it even more of a burst of flavor. If you don’t have jam, try this:

Slowly bring 1/2 cup huckleberries and 2 tablespoons sugar to a boil in a small pan. Whisk in 1 teaspoon cornstarch and let the mixture simmer on low for 2 minutes, stirring constantly. Allow mixture to cool. Combine 1 tablespoon of this sauce with 2 tablespoons milk then whisk in enough powdered sugar to make a thick glaze. Use a ziploc bag with the tip snipped off to decorate the scones.

Making a tasty icing.

Making a tasty icing.

I know what you’re going to ask. I do!  Yes, you can substitute blueberries for huckleberries. I’d recommend the frozen wild blueberries though, because they are so flavorful.

If I didn’t love huckleberries so much, I’d cave in and use blueberries – but I am willing to ignore my fear of bears (I carry bear spray), my problematic ankle (I destroyed it huckleberry picking two years ago and have to wear a brace and be very, very careful) my hatred of yellow jackets (I wear unscented everything and dress in neutral colors) and the back breaking bending and squatting that goes with the experience, because there is just nothing like a wild huckleberry!

Sounds like fun, huh? But OH so worth it.

Have a margarita scone and see for yourself!

Lorinda