Edible Soup Spoons

Who needs soda crackers in their soup when it’s so easy to make edible spoons? Yes, you can have your spoon and eat it too! Surprisingly, one spoon will make it through an entire bowl of soup without falling apart, but if you give each person two or three, they can crunch away as they go, which is half the fun.

I used a little yeast in this simple dough to keep the spoons light; we wouldn’t want to break a tooth on them, right? The dough won’t rise much, but it will be easier to work with after an hour of rest. While I worked with half of the dough (I don’t have four dozen spoons) the other half was covered with plastic wrap, rising a bit again as it waited its turn. Once the spoons are covered with dough they go straight into the oven, because you don’t want them to rise at that point.

If you don’t need four dozen spoons, you could turn the remaining dough into breadsticks by cutting the dough into strips, brushing with melted butter and then sprinkling with garlic salt and Italian cheese. Give them a twist and bake until light brown and crunchy.

I can fit 18 spoons on a cookie sheet, which was plenty for me! If you get tired of making spoons, turn the rest of the dough into crunchy breadsticks.

Since the spoons need to be very firm, crunchy is what we’re going for here. VERY CRUNCHY! If you want soft, tender breadsticks, try my Breadsticks…How Cheesy Can You get?

I tried many different methods for shaping the dough to see which was fastest and easiest for me, and settled on rolling the dough out very thin, then cutting rough spoon shapes with a sharp knife. You may prefer to roll small pieces into ropes (skinny on one end, fat on the other), but the important thing is to cover the spoon with a very thin layer of dough. If it’s too thick it won’t be as crisp, and it will puff up, which won’t leave enough room in the bowl of the spoon for soup.

Thin, thicker, thickest!
The spoon on the left would be for a light soup. The spoon on the right would work for chili.

Edible Soup Spoons
Print
Author:
Makes at least 4 dozen edible spoons.
Ingredients
  • 1 cup warm water
  • ¾ teaspoon salt (or garlic salt)
  • 1 teaspoon sugar
  • 2½ cups bread flour
  • ½ teaspoon instant yeast (rapid rise)
  • Butter to coat the spoons
Instructions
  1. In a large bowl, combine the water, salt and sugar.
  2. Add flour and yeast. (If using a stand mixer, switch to a dough hook.) Mix until dough comes cleanly away from the sides of the bowl, adding a little more flour if necessary.
  3. Place dough on a floured surface and knead a few times until dough isn't sticky. Place in greased bowl or a plastic bag. Let dough sit for 1 hour. It will rise a little, but will not double.
  4. Heat oven to 375 F. Cover two baking sheets with parchment. (The spoons slip around easily; use baking sheets with sides, if possible.) Gather STAINLESS teaspoons and tablespoons and place them upside down on the baking sheets. Coat the backs lightly with a thin coating of butter.
  5. Divide dough in half. Return one half to bowl or plastic bag while you work with the other half.
  6. On a floured surface, roll dough out very thin . . .no more than ⅛ inch. With a sharp knife cut out shapes roughly the size and shape of a spoon. Don't worry about being exact; you can stretch and pat the dough to fit.
  7. Start with the bowl of the spoon, pressing the dough to fit all the way to the edges. Press with the palm of your hand to make it even, trimming any excess around the edge with scissors if necessary.
  8. Twist the dough at the bottom of the bowl, where it turns into the handle, and press firmly onto the spoon, then cover the handle with the dough, cutting off the end or twisting it decoratively. You can also twist the whole handle, or braid . . . have fun and experiment!
  9. When all of the spoons are covered with dough, place the baking sheet into the oven. Bake approximately 18-20 minutes, depending on the thickness of your dough and the weight of your silverware. Look for a rich golden brown around the edges.
  10. Remove from oven and leave the dough on the spoons for 5 minutes. Remove and allow stainless spoons to cool before repeating with the remaining dough.
  11. Best if used promptly, but if you are making them ahead, make sure they are completely cool before storing.
  12. You can also freeze them. If you want to serve them warm, just pop them in the oven for a few minutes at 375 F.

Place dough in greased bowl or plastic bag and let it sit for 1 hour. It will rise a little, but won’t double.

This dough was a little thick. Thin is better, but if you want sturdy, be sure to bake it a little longer.

Ready for the oven.

Baked. Let them sit on the spoons for 5 minutes.

We’re moving into my favorite time of year. Pears and apples, nutmeg and cinnamon, maple everything . . . I love Fall! The garden goes to sleep and I have time to play in the kitchen and linger in my happy place. I just bought forty pounds of Honeycrisp apples and some gorgeous pears, so I guess you know what’s coming next.

Lorinda

Smoked Almond Crackers

I’ve been on a bit of a binge lately, and have probably eaten my weight in hickory smoked almonds in the last month or two. My obsession shows no sign of stopping. This is actually good news for you, because it inspired me to use part of my stash to create very tasty crackers that pair beautifully with salmon dip. And Chardonnay.

I hate to appear wishy-washy by giving you a lot of options and alternatives, but some people will click out of a recipe if it says something scary like “roll the dough”. I get it – rolling dough can be messy and time consuming. I’m going to give you an alternative to that. Personally, I love rolling out dough. It may be the only exercise I have in a day!

First, the basic method:

To make flat crackers, the dough is rolled out and then cut into any shapes that float your boat. But you can also flip a mini-muffin pan over and drape circles of dough over the . . . bottom of the pan to create crunchy little cups.These are genius, because they hold more dip.

Whether you make flat crackers or cups, you’ll need to get the dough very thin – no more than 1/8-inch thick. Thinner is even better. Don’t worry, it’s easy dough to work with. The simplest way to make the flat crackers is by rolling the dough directly onto a baking sheet. You don’t need to separate the crackers – just cut them with a pastry (or pizza) cutter and bake.Or you can use cookie cutters for cute shapes, cutting them directly on the pan or by rolling your dough on a floured surface (removing the scraps for re-rolling).

From left to right – thick to thin. The thick cups were 1/8-inch, the ones on the right were probably 1/16-inch.

Once the crackers or cups are baked and the oven’s turned off, any crackers that aren’t completely hard (which would be those on the thicker side of the scale) get returned to the warm oven to dry out for 30-40 minutes. This ensures a crispy, crunchy, sturdy cracker that will store well.

For you rollingpinphobes, I had an idea that worked very well. Do you have a tortilla press? Love mine, and it wasn’t very expensive at all. Just plop a ball of dough between pieces of parchment and press down gently. Don’t press all the way or you’ll end up with a VERY thin piece of dough that will tear easily. I can cut three 2 1/2-inch circles  at a time this way, and the thickness is consistent. 

When I first tried making these, I assumed that the salt content of the almonds and the cheese would be enough, so I didn’t add any salt. But crackers need to be salty in my opinion, and they just didn’t quite cut it, so I added a small amount of salt to the second batch and found them to be perfect. If you’re a real salt lover, sprinkle a little on the top of the crackers before baking.

No, I don’t get a kickback for this. I just love this stuff and want to share!

I used this Sweet Onion Sugar on one batch because I crave the whole sweet/salty/savory experience, and it was a big hit. My bottle was a gift from a friend, purchased from an amazing store in Montana called The Copper Moose . . . one of those places that could make a foodie run rampant, scooping up things they never even knew existed. Danger, danger, danger.

This recipe will yield approximately 4 dozen dip cups or 2-inch square crackers.

Smoked Almond Crackers
Print
Author:
Makes 48
Ingredients
  • 1 cup hickory smoked almonds
  • 1 cup grated extra-sharp cheddar cheese
  • 1 cup all-purpose flour
  • 1 teaspoon baking powder
  • ½ teaspoon baking soda
  • ⅛ teaspoon salt
  • ¼ teaspoon garlic powder
  • 1 tablespoon brown sugar
  • ¼ cup oil
  • ⅓ cup buttermilk
  • 1 teaspoon Worcestershire sauce
Instructions
  1. Heat oven to 425 F.
  2. For flat crackers you will need a large, flat baking sheet. For cracker cups, you will need a mini-muffin pan. If your muffin pan isn't non-stick, you will also need small paper liners.
  3. Chop the almonds very fine. To save time, you can us a blender or food processor, using short pulses to avoid turning it into paste.
  4. In a large bowl, combine almonds, cheese, flour, baking powder, baking soda, salt, garlic powder, and brown sugar. Mix well.
  5. Add oil, buttermilk, and Worcestershire sauce. Use a heavy spoon or your hand to thoroughly combine. You should be able to form the mixture into a ball with your hands.
  6. FOR FLAT CRACKERS: Roll directly onto ungreased baking sheet. Lightly flour rolling pin and the top of the dough and roll very thin, no more than ⅛-inch. Use a pastry (or pizza) cutter to cut into squares or diamonds. You don't need to separate them. Alternatively, you can use cookie cutters. Lift the scraps between the shapes and save for re-rolling. Sprinkle with salt if desired and bake 7 minutes, or until crackers are rich golden brown. Remove from oven and place baking sheet on rack to cool. Repeat with remaining dough. Once all crackers are baked, check to see if crackers are dry and crunchy. If not, turn oven off and open the door for 30 seconds. Return crackers to warm oven for 30-40 minutes to dry out.
  7. FOR CRACKER CUPS: Turn mini-muffin pan upside down. Lightly grease non-stick pans, or cover each metal cup with a paper liner if your pan isn't non-stick. Roll out dough on floured surface, or press balls of dough between pieces of parchment in a tortilla press. Dough should be no thicker than ⅛-inch. Thinner is better! Cut circles that are 2½ inches and drape the dough circles over each cup, shaping gently. If any holes or tears appear, patch them with a pinch of dough. Bake 7 minutes, or until rich golden brown. Move pan to cooling rack and allow cups to cool for at least 5 minutes before lifting each one carefully from the pan. Remove paper liners if you're using them. Once all the cups are baked check to see if cups are dry and crunchy. If not, turn off oven and open door for 30 seconds. Place cups on a baking sheet and return to warm oven for 30-40 minutes to dry out.

Chop the almonds (no big pieces!) or use a blender or food processor.

For flat crackers, roll the dough right on the baking sheet. Cut with pastry or pizza cutter or cookie cutters.

For dip cups, loosely shape dough on the upside-down mini-muffin pan and bake.

There – I posted something that wasn’t sweet for a change. Now on to Mother’s day creations, and I’m pretty sure I’ll be pulling out all the stops.

Lorinda


Sourdough Soda Crackers

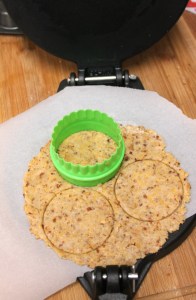
Soda crackers are lots of fun to make and can be shaped however you wish, from traditional squares to seasonal shapes. Sprinkle on cheese, basil, or garlic salt before baking for a savory treat. A little sourdough starter adds a little extra leavening, though the flavor really isn’t detectable.

I’ve played with this recipe a number of times over the last few months, trying to get that perfect blend of crispy and flaky. It’s a fine line, because if they aren’t cooked quite long enough, they aren’t crisp all the way through. Too long (a minute or two makes a huge difference), and they turn brown. I think I finally nailed it, and had fun in the process.

You’ll need sourdough starter. Hopefully you have some in the fridge, but if not, check out my post for Pumpkin Sourdough Bread. There are several ways to get your hands on this valuable stuff!

I use half butter and half shortening in these crackers. I hate to use shortening, but if you read the ingredient label on a box of saltines, you’ll realize that the homemade version is still much more wholesome! I haven’t tried it with all butter; maybe soon. My husband is hoping they’ll turn out like Ritz.

Tips:

  • Use COLD ingredients, and don’t over mix. You want to see small chunks of butter and shortening.
  • Sprinkle with herbs, spices, or shredded cheese if you like savory crackers. The cheese will get dark, so you may want to add it half way through the cooking time.
  • For fun, create hanging (perching?) crackers by cutting slots on the side to fit your mug or bowl before baking. From my recent experience, I can tell you…angle matters! Do a trial template with a piece of cardboard or toast first.
Sourdough Soda Crackers
Print
Author:
Makes approximately 3 dozen crackers.
Ingredients
  • 1 cup all purpose flour
  • ¼ teaspoon baking soda
  • ½ teaspoon salt
  • 2 tablespoons cold butter
  • 2 tablespoons cold shortening
  • ¼ cup sourdough starter
  • 2 tablespoons very cold water
  • Cooking spray
Instructions
  1. In a medium bowl, combine flour, baking soda, and salt.
  2. With a pastry blender, blend the butter and shortening into the dry ingredients until small chunks remain - about the size of large peas. Don't over-blend.
  3. Combine sourdough starter and cold water. Pour over flour mixture, tossing with a fork or your hands. THE DOUGH WILL NOT COME TOGETHER IN A COHESIVE BALL.
  4. Drop the crumbly dough onto a lightly floured surface and press gently to give it a rectangular shape, approximately 5"x9", using a bench scraper, putty knife, or large spatula to form straight edges. Keeping the short edge facing you, Flip the bottom edge up to the middle (it will be crumbly...just do the best you can) and the the top edge down to the bottom. This will create three equal sized layers. Give the dough a turn to the left, lightly flouring the surface if necessary to keep it from sticking, and repeat. Repeat 3 more times. (5 times total.)
  5. Roll to 5"x9", cover it in plastic wrap, and chill for 1 hour.
  6. Heat oven to 400 F.
  7. Roll dough out on lightly floured surface. Dough should be very thin - less than ⅛". This will take some time - and muscle! It may help to lift dough and stretch gently a few times during the rolling process. If you are making square crackers, try to keep the dough square or rectangular.
  8. Spray lightly with cooking spray, sprinkle with salt, and poke little holes in the entire surface with a fork. Cut into desired shapes. If you are making shapes other than squares, place them close together, because you won't be able to re-roll the scraps.
  9. Place on ungreased baking sheet, close together but not touching.
  10. Bake for approximately 9 minutes, or until the crackers just start turning golden brown.
  11. Immediately slide off of cookie sheet onto cooling rack.
  12. NOTE: When the crackers are cooled, test one. If they aren't as crispy as you'd like, heat oven to 250 F. and place crackers back in the oven to dry out for 5-6 minutes. Watch them carefully, and remove them if they start to brown.

Doesn’t look like it will ever come together, does it?

Fold in thirds and turn. The first time…a mess! By the fifth time, it’s flexible dough!

Roll one last time, then wrap and chill for an hour

Time to roll chilled dough out THIN. Do you have one of these tools? This little roller really helps get things going. Then I move on to my big rolling pin.

Poke holes in rolled dough with a fork. Spray with oil, sprinkle with salt, and cut out squares or shapes.

The dough needs to be rolled very thin!

I’ve been busy in the kitchen this week, and have more Valentine posts on the way. Come back soon!

Lorinda

Football Rye Crackers and Cheese Ball

football rye crackers and cheese ball The Rowdy BakerBring this dish to any football party and be a hero! A smooth, velvety, football-shaped cheese ball is surrounded by sturdy, homemade rye crackers…also shaped like footballs, because – well – football!

After a couple of attempts that yielded hard, very crunchy crackers, I finally got the knack for these.  Add more flavoring if you wish – I kept this pretty basic, preferring to let the flavor of the caraway seeds predominate . These are delicious warm out of the oven…you’ll see!

I tried two different methods for adding the lacing to the crackers. I like the appearance of the little dough laces best, but cutting out all those tiny pieces and pressing them carefully and firmly on each cracker takes a lot of time, so I won’t blame you one little bit if you go the easy route and just press the designs onto the crackers with a table knife – Especially when you consider the crackers will probably be consumed by people jumping and screaming at the TV, and not paying close attention to the detail on each cracker!

This dough is really very easy to roll out, especially if you roll it between sheets of floured parchment. If you want to skip the football shapes, simply use a pizza cutter to cut the crackers into strips and put them, parchment and all, straight onto your baking sheet.

And…in case you’re wondering, they’re delicious with peanut butter slathered on them.

You probably have your own recipe for a cheese ball, right? If not, I’ll tell you how I made mine at the bottom of the post.

Here’s my easy recipe for rye crackers.

Rye Cracker Footballs
Print
Author:
The crackers can also be cut into strips on the parchment, and then lifted (without separating them) parchment and all onto an ungreased baking sheet. Follow instructions for baking.
Ingredients
  • ¼ cup cooking oil
  • ¼ cup buttermilk
  • ¼ cup water
  • 1 tablespoon molasses
  • ½ cup all-purpose flour
  • 1 cup rye flour
  • 1 teaspoon unsweetened cocoa powder
  • ½ teaspoon baking soda
  • ½ teaspoon baking powder
  • ¼ teaspoon garlic salt
  • ¼ teaspoon onion powder
  • 1 heaping teaspoon caraway seeds (more to taste)
  • 1 tablespoon butter
  • coarse salt
Instructions
  1. Heat oven to 400 F.
  2. Lightly grease a baking sheet and set aside.
  3. In a medium bowl, combine the oil, buttermilk, water, and molasses.
  4. Stir in all-purpose flour, rye flour, cocoa, baking soda, baking powder, garlic salt, onion powder, and caraway seeds. Mixture should be thick, and slightly sticky. If it's very sticky, add a little more flour.
  5. Lightly flour a large piece of parchment.
  6. Place dough on parchment, sprinkle lightly with a little more flour, cover with another piece of parchment, and roll very thin...about the size of a baking sheet. Thin dough makes light, crunchy crackers!
  7. Cut out shapes using a football cookie cutter, and place closely together on the prepared baking sheet. It's best to work with just one pan of crackers at a time, so wrap remaining dough in plastic and place in the refrigerator for now.
  8. There are two ways to create "laces". You can firmly press thin strips of slightly moistened dough onto each cracker, or simple press the lace design into the cracker with a table knife.
  9. Put crackers in the oven and bake for 5 minutes. Remove from oven, brush with melted butter (if you make "laces" on football shapes, you may have to gently pat the butter on the surface to avoid dislodging the laces) and sprinkle with coarse salt. Turn oven OFF. Open oven door for 30 seconds (count it: one-chimpanzee, two-chimpanzee...), place pan of crackers back in the oven, close the door and leave them alone for one hour. Don't peek - it will let out the residual heat.
  10. Move crackers to a cooling rack and allow them to cool completely. Repeat with remaining dough.
  11. If you choose to do all of the crackers at once, test a cracker from each pan. If they aren't completely crunchy, return them to the warm oven for 15 more minutes.

Flatten lightly floured dough and cover with a sheet of parchment.

Flatten lightly floured dough and cover with a sheet of parchment.

Roll the dough thinly.

Roll the dough thinly.

Dough must be VERY thin for light, crisp crackers.

Dough must be VERY thin for light, crisp crackers.

If you lack the patience for gluing tiny laces on each cracker, use a knife and just press in the design!

If you lack the patience for gluing tiny laces on each cracker, use a knife and just press in the design!

Baked!

Baked! Both option for laces are shown here.

Here’s how I made my cheese ball:

24 ounces cream cheese, softened
6 cups of your favorite cheese, grated (I used sharp cheddar and white cheddar.)
1 tablespoon Worcestershire sauce
1 cup chopped green onions
Optional: a few drops of hickory smoke flavoring, garlic powder, hot sauce.
1 cup finely chopped TOASTED pecans
1/4 cup finely chopped crisp-cooked bacon

Mix together the cheeses and Worcestershire sauce until well blended. I like to use my stand mixer with the dough hook.
Add green onions and additional seasoning, if desired.
TASTE! Between the Worcestershire sauce and the cheese, you probably don’t need to add salt, but now is the time to give it a flavor test.
With damp hands, press the cheese mixture into the shape of a football.
Combine the pecans and bacon. Press onto cheese ball, covering completely.
Transfer to a platter and refrigerate until you’re ready to serve – then surround with lovely rye crackers!

Since I have you here, and you’re actually reading this, may I just say:

GO SEAHAWKS!!!

Lorinda


Savory Bacon Crackers


Savory Bacon Crackers verticalI can’t even begin to tell you how relieved thrilled I am to be posting this recipe for Savory Bacon Crackers. After countless tries, with results ranging from “marginal” to “close…but no cigar”, I finally produced crunchy, flavorful crackers that got gobbled up by the tasting crew.

I tried making them yeast-based (bleh), I layered the dough with butter (like croissant dough), I baked them hot and fast, and low and slow. I tried chilling the dough for days.

Meh.

In the end, it was just a matter of getting the proportions right and finding a way to make sure the crackers were crunchy all the way through. These aren’t flaky (like Ritz), but are delightfully light and crunchy, yet still sturdy enough for dipping. And did I mention they taste great?

Crushed bacon adds flavor and texture. Make sure you cook the bacon until it’s extra-crispy. I pan fry mine, then wrap it in paper towels and microwave for a minute or two and shake the bacon out onto another piece of paper towel to cool. Crush with a rolling pin or use a sharp blade – either a knife or an ulu – to make small crumbs.

Savory Bacon Crackers
Print
Author:
Makes almost 1 pound of crackers.
Ingredients
  • 2 cups all-purpose flour
  • 1 teaspoon baking powder
  • ½ teaspoon baking soda
  • ½ teaspoon garlic salt
  • ½ teaspoon onion powder
  • ½ teaspoon pepper
  • ¼ cup brown sugar, lightly packed
  • ½ cup finely crushed bacon - about 10 strips (reserve the grease)
  • 1 teaspoon liquid smoke
  • ¼ cup oil (I use peanut oil)
  • ½ cup buttermilk
  • ¼ cup water
  • Sea salt
Instructions
  1. Heat oven to 425 F.
  2. Grease two baking sheets with bacon grease (or you may use shortening if you prefer)
  3. In a large bowl, combine the flour, baking powder, baking soda, garlic salt, onion powder, pepper, brown sugar, and crushed bacon.
  4. Stir in the liquid smoke, oil, buttermilk, and water. Mix until well combined. This will be a soft dough, but shouldn't be sticky.
  5. Working with half of the dough at a time, either roll between two pieces of parchment (flour dough lightly if necessary) or roll directly onto the baking sheet, dusting the top with flour as needed.. Try to roll the dough out as thinly as possible...less than ⅛-inch. You may cut round shapes out, re-rolling the extra dough, or simply cut into squares or diamonds, using a pizza cutter.
  6. Place pans in preheated oven for 4 minutes. Remove both pans. Brush the tops of the crackers with bacon grease (or butter, if you prefer) and lightly salt. Using a spatula, flip the crackers over.
  7. TURN OFF THE OVEN. Open the door for 20 seconds. Place pans back in the oven, close the door, and leave the crackers to cook slowly for 1 hour, as the oven cools down. Check one to make sure it snaps crisply when broken. If not, leave them in the oven for another 30 minutes.


Crush the crisp bacon or finely chop.

Crush the crisp bacon or finely chop.

This is a must! Add Liquid Smoke.

This is a must! Add Liquid Smoke.

Roll them THIN, and cut however you like.

Roll them THIN, and cut however you like.

Brush with bacon grease, sprinkle with salt, flip over, and return to oven.

Brush with bacon grease, sprinkle with salt, flip over, and return to oven.

Do you have any idea how good these would be with my Succulent Salmon Dip? I’d leave the bacon out of the dip (unless you’re a really hardcore bacon fan) and offer a knife to spread the dip on each cracker. Ham spread would be yummy too.

Okay – this was my obligatory savory recipe before I go into full-blown Easter mode. I’ve stocked up on powdered sugar, chocolate, and sprinkles…and will be putting it all to good use soon!
Lorinda

Endurance Crackers with a Sweet Twist

Get in my belly!

Get in my belly!

Now, don’t turn your nose up at this. I promised you something healthy, and I’m delivering! Here is a very easy recipe that is incredibly good for you and unspeakably addicting. The hardest thing you will have to do is go to the grocery (or natural foods) store and buy the four types of seeds. No gluten, no nuts. You will eat it and you will like it, damn it!

Sunflower, sesame, pumpkin, and chia seeds

Sunflower, sesame, pumpkin, and chia seeds

If you have never heard of Endurance Crackers, you absolutely must try them. Here is a link to Oh She Glows, where you’ll find Angela’s wonderful recipe. You will be amazed at how much flavor these savory little crackers have. I literally have to try to hide them from myself, because I can’t stop at one or two. Or three or four.

Here's what an Endurance Cracker looks like when it isn't being gussied up with chocolate!

Here’s what an Endurance Cracker looks like when it isn’t being gussied up with chocolate!

I discovered this recipe when I read the book Born to Run by Christopher McDougall and was inspired to write an article about chia for Yummy Northwest. If you’re curious about the health benefits of chia, or just want to try my yummy apple chia muffin recipe, here’s a link to the column: Ch-Ch-Ch-Chia

For fun, I adapted the recipe for Endurance Crackers, removing the garlic and onions and adding a dark chocolate layer. I added just a little extra kosher salt, too, for more contrast between the seeds and the chocolate, and love the results! Then, because I JUST.CAN’T.STOP,  I added raisins. Oh, yum!

When a craving for “something sweet – no, something salty – no, something sweet” comes along, grab a couple of these. Eating them will feel sinful, but they are actually very good for you. We’ve all heard the hype about dark chocolate and how it’s full of antioxidants, right? The experts all agree dark chocolate is healthful, but can’t agree on how MUCH is good for you, so they hedge by recommending an ounce a day. This recipe uses 5 ounces of chocolate, so if you eat a few crackers as a snack, it’s well within the chocolate “limit.”

That pretty much makes me blow coffee out my nose; “chocolate” and “limit” shouldn’t even be used in the same sentence! What? Oh, fine – you busted me…substitute “wine” for “coffee.” Nitpickers.

The original recipe calls for parchment. My crackers always stick to it, even if I grease it first. Maybe I just own inferior parchment (a distinct possibility) but I find it easier to lightly grease a cookie sheet instead, and skip the parchment. And rather than cutting the crackers after the first 30 minute baking time, I tried to keep it all in one big piece to make it easier to “frost” with chocolate. Either way would work.

Here’s my version of Angela’s recipe. Do pop over to her blog, though, and try the original version!

Endurance Crackers with a Sweet Twist
Print
Author:
Adapted from "Oh She Glows", Endurance Crackers
Ingredients
  • ½ cup raw sunflower seeds
  • ½ cup raw sesame seeds
  • ½ cup raw pumpkin seeds
  • ½ cup raw chia seeds
  • 1 teaspoon kosher salt
  • 1 cup water
  • 5 ounces dark (at least 70% cocoa) chocolate, finely chopped
  • 1 cup raisins (optional)
Instructions
  1. Heat oven to 325 F.
  2. Lightly grease a cookie sheet (or use parchment) and set aside.
  3. In a large bowl, stir together the seeds and salt.
  4. Add the water, stirring well.
  5. Press the mixture onto a cookie sheet, using a spatula or (best choice) a damp hand. Aim for a thickness somewhere between ¼-inch and ⅓-inch.
  6. Bake for 30 minutes.
  7. Remove from oven. Loosen with a long flat spatula, cover with another greased cookie sheet, and invert. If it doesn't all flip over in one piece, don't worry. The crackers will be broken up eventually!
  8. Bake for another 30 minutes.
  9. Remove from oven and sprinkle evenly with the chopped chocolate. Wait a few minutes and then spread with a flat spatula. Sprinkle with raisins if desired.
  10. When the chocolate has hardened (you may refrigerate it if you wish, to hurry it along) break into pieces and store in an airtight container.


Spreading the mixture on a baking sheet. (Hint: a hand works better than a spatula!)

Spreading the mixture on a baking sheet. (Hint: a hand works better than a spatula!)

If you're using parchment, after 30 minutes you'll flip the seeds over, peel off the paper, and continue to bake.

If you’re using parchment, after 30 minutes you’ll flip the seeds over, peel off the paper, and continue to bake.

Sprinkle chopped chocolate over the hot seeds. I used a scraper, but a paper plate or a bowl works well too!

Sprinkle chopped chocolate over the hot seeds. I used a scraper, but a paper plate or a bowl works well too!

Spread the chocolate as evenly as possible.

Spread the chocolate as evenly as possible. Add raisins if you’d like.

When the chocolate is firm, break the crackers into serving-size pieces. I'll let YOU determine what a serving is!

When the chocolate is firm, break the crackers into serving-size pieces. I’ll let YOU determine what a serving is!

So…you won’t see this often, but I made it through a post without unwrapping a stick of butter or opening a bag of sugar. High five!

YEP, I’M OFFICIALLY CRACKERS!

If I were organized enough to write lists, I’d have one as long as my arm titled “Things That Must Be Done TODAY.” With that in mind, I followed my favorite avoidance strategy and started baking. Hey – it’s the perfect procrastination technique, because I’m obviously busy, productive, and removed from reality!

Homemade “Wheat Thins”

Today I thought I’d try a recipe I saw on Serious Eats for homemade Wheat Thin-type crackers.  It looked simple enough, and I counted on a quick distraction with a wholesome result. “Everyone” said they tasted just like the real thing. Huh. I just finished my fifth attempt; it’s time to cook dinner, and nothing else has been accomplished. A perfect Monday project!

Batch #1: I followed the recipe exactly and got a very healthy cracker that would probably be wonderful if you had a bowl of salmon dip to go with it. On the plus side, it tasted and looked good, and was made with quality ingredients. On the minus side, it was definitely not like a Wheat Thin. I know this because I L.O.V.E Wheat Thins. It just wasn’t crispy enough, and didn’t have that “snap” to it that I wanted.

I’ll be seeing these tonight when I close my eyes!

Batch #2: So I tried again. This time I tried the recipe with half shortening and half butter. I baked half of the dough and then added dried basil and garlic to the other half. Still not crispy enough, even though I pretty much burned the basil and garlic batch. Damn Facebook.

Batch #3: I used half shortening and half butter, and then replaced half of the wheat flour with white. Better. Not as nutritious, but the cracker was definitely crispier. It helped that I rolled the second half of the dough out thinner. Really thin. Communion wafer thin. (If I had a pasta maker this would have been much easier.) But still….meh. Not what I was looking for.

Cutting wheat crackers.

Batch #4: By the time I started my fourth batch, healthy wasn’t even a goal anymore. Now I just wanted to make a Wheat Thin! All shortening, half white flour, part brown sugar (to try to add the flavor that Nabisco gets by using malt syrup and invert sugar) and a little cornstarch. They looked prettier, and were very acceptable; I’d proudly serve them to company. But they were definitely lacking crunch. By now I’m really frustrated, but not beaten.

For Batch #5, peanut oil was substituted for shortening and I add a little baking soda. I coated the cookie sheet with peanut oil and salt, put the dough squares on the sheet, and then turned them over so that both sides would be lightly coated. I turned the temperature down from 400 F to 350 F and set the timer for 15 minutes.

They were looking good, but weren’t quite done. This is where I often run into trouble. My famous line is “I’ll just give them another minute or two” and then mosey off to the computer or a book. Here’s what usually happens:

What a difference a few minutes make! Bleh.


So I set the timer for 5 more minutes, and was rewarded with a perfectly browned batch of crackers. I wish I could tell you they turned out JUST LIKE WHEAT THINS. I know you can’t see me, but I blush when I lie, so I try to stick to the truth. They were good. Very good. Wheaty and attractive. You will like them, I’m sure. But the perfect recipe eludes me, and after a whole day of baking and testing, I guess it’s time to cry uncle.

Sometimes “good enough” is the reality.

So many rejects. Sigh.

Thin Wheat Crackers
Print
Author:
Ingredients
  • ¾ cup whole wheat flour
  • ¾ cup all-purpose white flour
  • 1½ tablespoons sugar
  • ½ teaspoon salt
  • ½ teaspoon baking soda
  • 5 tablespoons peanut oil (plus 2 teaspoons for baking sheets)
  • ¼ cup water (more if needed)
Instructions
  1. Preheat oven to 350 F.
  2. In a large bowl, combine flours, sugar, salt, and baking soda.
  3. Add oil and water, mix thoroughly. Add just enough additional water to be able to form the dough into a ball.
  4. Pour 1 teaspoon of oil on baking sheet and sprinkle generously with salt. Set aside.
  5. Working with half of the dough at a time, on a floured surface roll dough out as thinly as possible. Cut into squares with a pizza cutter.
  6. Place squares onto oiled baking sheet. Turn each one over so that all squares are lightly coated on both sides.
  7. Bake for 15 minutes. Flip crackers over and continue to bake until browning around edges, approximately another 5-8 minutes. Watch carefully.
  8. Put baking sheet on rack to cool.
  9. Repeat with remaining dough.
  10. Makes approximately 60 crackers.