Cranberry Pecan Snowballs

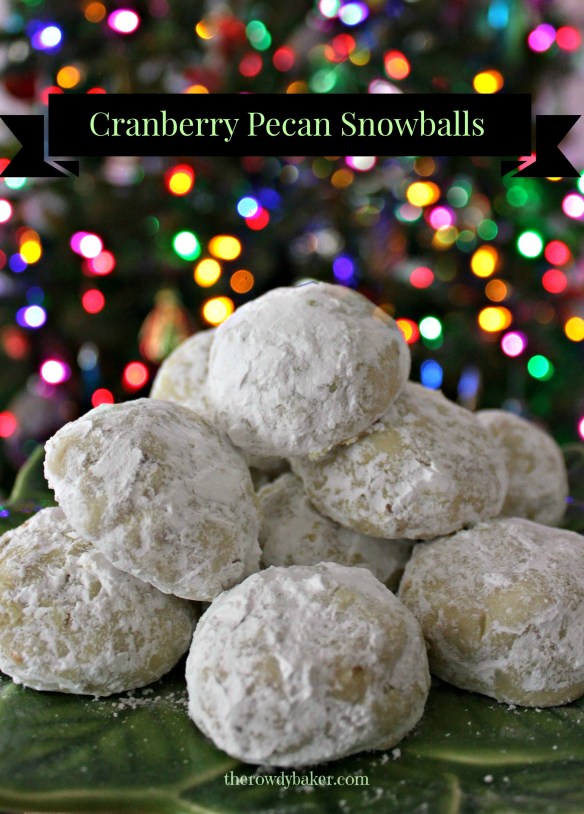
One bite of these buttery snowball cookies will tell you they aren’t your mama’s tea cakes. The dough is subtly flavored with orange zest, and a sweet cranberry filling hides in the center. If you choose to add a fresh cranberry, it will add a burst of tangy flavor.

Whether you call them Russian Tea Cakes, Mexican (or Italian) Wedding Cakes, or Snowballs, they are a holiday tradition worth making. They do tend to be just a little bit dry (like shortbread) so a small dab of filling to soften the center worked well. Of course, if you don’t want all the bells and whistles, you can simply leave out the filling entirely. But oh, not the orange zest! It’s so good.

I am pretty hands-on, and use my thumb to make the hole in each ball of dough (where the filling is added) but if it makes you more comfortable, it can be made with the round handle of a wooden spoon . . . or you can wear disposable gloves. The only tricky part is to make the dough at the top of the hole thinner—and don’t over fill, of course—so the cookie can be neatly pinched closed. If a little filling squeezes out, just wipe it off and patch the spot with a small piece of dough before rolling into a smooth ball.

Easy as 1,2,3! Fill, pinch and roll.

Cranberry Pecan Snowballs
Print
Author:
For best results, once cookies are filled and formed, chill for 1 hour before baking. They can be chilled on the baking sheets, or the balls of dough can be put in a large cake pan and then transferred. You can skip this step, but they will be slightly flatter.
Ingredients
  • FILLING:
  • 4 ounces cream cheese, softened
  • 1 tablespoon cranberry sauce (jellied or whole berry)
  • a few drops of red food coloring (optional)
  • ¼ cup white chocolate chips
  • 24 fresh cranberries (optional)
  • DOUGH:
  • 1 cup butter, softened
  • ¾ cup powdered sugar
  • 1 cup finely chopped pecans (I toast mine first for the best flavor)
  • Zest of one large orange (about 1 packed tablespoon)
  • 2 teaspoons vanilla
  • 2 cups all-purpose flour
  • ½ teaspoon salt
  • Powdered sugar to roll cookies in
Instructions
  1. FILLING: In a small bowl, beat together the cream cheese and cranberry sauce. If desired, add a few drops of red food coloring.
  2. Melt the white chocolate in a small pan on lowest heat, or in a microwave-safe bowl in the microwave at fifteen second increments. Don't get it too hot - just until melted. Add to cream cheese mixture and beat until smooth. Place in a pastry bag and set aside. (You can skip the pastry bag and just use a ½ teaspoon measuring spoon to fill the cookies, but it will be messier.)
  3. DOUGH: In a large bowl, beat butter until creamy. Add powdered sugar and beat for 1 minute, scraping sides of the bowl often.
  4. Add chopped pecans, orange zest, and vanilla. Beat well.
  5. Add flour and salt. Beat just until blended.
  6. Make balls of dough, using a generous tablespoon of dough for each. (You should have about 24.) Make a deep hole in each. The easiest way is to cup your hand around the dough with it poking out of the circle made by your thumb and forefinger. Use a finger on your opposite hand (or the rounded handle of a wooden spoon) to make the hole, then widen it so it's a little thinner at the top. Using a pastry bag, fill the hole about half way. Press a raw cranberry (if you're using them) on the filling and gently pinch the dough over the hole. Roll between your hands to form a round ball. Place 1½ inches apart on ungreased (or parchment lined) baking sheet.
  7. Repeat until all cookies are formed. If you have time (and room in your fridge) chill for 1 hour.
  8. Heat oven to 325 F. Bake cookies 15-17 minutes, until just the bottoms are lightly browned.
  9. Let the cookies rest on the baking sheet for a minute or two before sliding onto a cooling rack.
  10. When the cookies are barely warm, dredge them in the powdered sugar. Wait until completely cool and repeat. Store in an airtight container.

Beat butter well (see how fluffy?) Add powdered sugar and beat for 1 minute.

Stir in finely chopped pecans, orange zest, and vanilla

Mix in the flour and salt. It will look crumbly at first, but keep beating; it will come together!

I found that the easiest way for me to fill the cookies was to wrap my hand around the ball of dough and use my other hand to make the hole, fill it, pop in a cranberry, and pinch the top.

But you might prefer working on a flat surface, like this:

Poke a hole in each ball with your thumb and thin the sides out. Add about a half teaspoon of filling

Add a fresh cranberry

Carefully pinch the cookie closed and roll gently between your palms to make a ball

The tops of your cookies shouldn’t brown, but the bottoms will turn a light golden brown.  I think my camera exaggerated the color, but I may have left this batch in the oven a minute too long. Meh . . . that’s what the powdered sugar is for!

Dredge warm cookies in a bowl of sifted powdered sugar. Wait until cool, then repeat. (For the second coat you can put the sugar in a paper bag and shake a few at a time.)

Wishing you peace,

Lorinda

Christmas Kisses (Meringue Topped Brownies)

Hang up that mistletoe, because a kiss just doesn’t get any sweeter than this! Each chewy chocolate brownie is filled with a sweet surprise and topped with a crisp peppermint meringue rosette, creating a harmony of flavors and textures. These little two-bite treats are sure to brighten up a holiday cookie platter or buffet table. And make sure to put one next to Santa’s glass of milk to give him a break from all of those sugar cookies.

If you prefer cake brownies, well . . . move along; there’s nothing to see here! Nope, these are chewy with a crunchy edge, just the way I love them.

It took me a few tries to get this right. Okay, five. It took me five tries. My first attempt was with a chocolate cookie crust. They were delicious, but so messy. SO MESSY. Meringues crackle and crumble when you bite into them, which is expected, but add a crumbly crust that falls everywhere, and it simply wasn’t going to work. I could just see these being served at a tea and having to hand out bibs!

I tried baking the brownies for a bit first, and the final result was a dry, hard, brownie brick. Nope.

The third time I realized that they were hollow. The bottom of the meringues melted into the brownies, and the meringues puffed and were hollow (as meringues are) which would have been kind of neat, if the tops didn’t pop off so easily. I could see them filled with ganache, and almost went that direction (you can, if you wish) but ultimately tried, tried again.

On the fourth batch I went for a slower, shorter bake time. Goo. ‘Nuff said.

So . . . I tried an experiment, hoping to give the meringues something to hold onto besides brownie batter. Peppermint patties erupted in the oven, but the other three optionssoft peppermint candy, chocolate kisses (point down) and peppermint kisses (point up)—all worked great. Whew. You have a choice!

Left to right: Soft peppermint puffs (give the best support), Chocolate kiss, and peppermint kiss.

And if you’d like to really add some bling, dip the tips of each kiss in a little melted white chocolate and sprinkle with crushed peppermint candy, grated chocolate, or sprinkles.

Here’s the recipe . . . tips and photos are below.

Christmas Kisses (Meringue Topped Brownies)
Print
Author:
Makes 48 kisses. Ultra fine sugar is recommended for the meringue, but regular sugar can be used. It just may need a little more beating to dissolve properly.
Ingredients
  • BROWNIE LAYER
  • ½ cup butter, melted
  • 2 tablespoons cooking oil
  • 1½ cup white sugar
  • 2 eggs
  • 1 teaspoon vanilla
  • ⅔ cup unsweetened cocoa powder (I used half regular, half special dark)
  • ¼ cup grated or very finely chopped dark chocolate
  • ¾ cup flour
  • ¼ teaspoon baking soda
  • ¼ teaspoon baking powder
  • ¼ teaspoon salt
  • Candy for filling - 48 each peppermint puffs or chocolate kisses)
  • MERINGUE:
  • 4 egg whites (at room temperature)
  • ½ teaspoon cream of tartar
  • ¾ cup ultrafine sugar (Baker's Sugar)
  • ¼ - ½ teaspoon peppermint extract
  • red food coloring (optional)
  • White chocolate melts, crushed candy cane, grated chocolate for decorating if desired
Instructions
  1. Heat oven to 250 F. Place 48 paper liners in mini muffin pans.
  2. BROWNIES:
  3. In a large bowl, stir together the melted butter, cooking oil, and sugar.
  4. In a small bowl, whisk together the eggs and vanilla until frothy, then add to large bowl and stir to combine.
  5. Add cocoa powder, grated chocolate, flour, baking soda, baking powder, and salt. Stir just until combined. A few wisps of flour showing is just fine.
  6. Using a pastry bag with large tube tip (or you can use a spoon) divide the brownie mixture between the 48 cavities - approximately 2 level teaspoons each.
  7. Add a piece of candy to each cup, pressing down firmly. If using a chocolate kiss, place it point down. Set aside.
  8. MERINGUE:
  9. In a squeaky clean bowl, beat egg whites until thick and foamy, then sprinkle in the cream of tartar and continue to beat until soft peaks form.
  10. Trickle in the superfinen sugar, a tablespoon or two at a time, beating well before adding more. Take your time to ensure the sugar dissolves completely.
  11. Once all sugar has been added, beat until mixture is at stiff peak stage and holds its shape. Depending on many factors (weather, size of eggs, etc.) this can take 5 or 6 minutes.
  12. Add peppermint extract and beat until combined.
  13. For striped meringues, use red paste food coloring to paint stripes up the inside of a large pastry bag fitted with a large open star tip. (It's easiest to do this in two steps, folding down the top of the bag and painting from the tip up, then unfolding the bag and continuing the stripes.)
  14. Pipe in a circular motion upwards. Leave a little edge of brownie showing to make them easier to handle. (Use up extra meringue mixture by piping on a baking sheet covered with parchment.)
  15. Place pans in the oven (including extra meringues) and let them cook for 30 minutes, then WITHOUT OPENING THE OVEN DOOR, turn oven off and leave the kisses in there overnight.
  16. If desired, dip the tip of each in melted white chocolate and sprinkle on crushed candy cane, grated chocolate, or chocolate jimmies.
  17. Store in airtight container.


Beat eggs and vanilla, and add to butter and sugar mixture.

Add the dry ingredients and stir JUST until combined.

Pipe (or spoon) into paper liners.

Add candy to support the meringue. (I could have just cropped out the peppermint patties, but I want to show you what happens if you use them!)

Perfect peaks on the meringue.

Paint red stripes in pastry bag OR just add a couple of drops of red coloring to meringue for pink rosettes.

Pipe on the meringue. Leave a little brownie edge to make them easier to remove from the pan.

Just say “no” to peppermint patties!

TIPS:

  • Start the day before, because these really should be left overnight in the oven.
  • When you wake up in the morning and remove the kisses from the oven, immediately place them in an airtight container.
  • Putting the chocolate kiss point down seemed to support the meringue better
  • Skip the stripes if you’d like. They’re pretty plain white or light pink, too.
  • Regardless of what you may have heard, meringues are simple to make, and unless you are in Florida and the humidity is ghastly, don’t sweat the weather. I made this batch while it was snowing like crazy outside.
  • You can skip the paper liners if you use a baking spray (like Baker’s Joy) in the cavities. Just use a table knife to pop the kisses out when they’re cool.
  • This recipe can easily be halved to make 24. (If you don’t have a 1/8 cup measure for the 3/8 cups of flour and superfine sugar, use 1/4 cup plus 2 tablespoons.)

I’m hoping to get one more Christmas post up, but things are crazier than usual around here, so just in case . . .

Merry Christmas to you and yours!

Lorinda

Chocolate Nonpareil Cookies

MiscDec2013 013

I brought home one of my husband’s favorite treats the other day – nonpareil candy. You know, the little flat chocolate wafers with the crunchy white sprinkles on top? I love ’em too, but after sampling a few just to make sure they were fresh (ahem) I satisfied myself with staring at them and wondering if I could make a cookie that would have the same eye appeal.

MiscDec2013 011

Yes, yes...this is JUST what I envisioned!

Yes, yes…this is JUST what I envisioned!

They’re pretty and festive, and pack a lot of crunch! You can NOT go all frugal and just sprinkle the little nonpareil sprinkles on them. The crispy, rich (and I mean rich!) cookie has to be dunked in chocolate and then pressed into the sprinkles to look right. I’ll tell you right now that you’ll need at least 2 bottles, maybe 3 of the nonpareil sprinkles. I can’t tell you for sure because I ran out of them part way through! I had no idea it would take that many. Plan B was to dip the remaining cookies in chocolate and sprinkle with crushed candy cane. Ta Da!

Nonpareil Cookies
Print
Author:
Makes approximately 60 small cookies.
Ingredients
  • 1 cup butter, softened
  • 1 cup sugar
  • 1 tablespoon vanilla
  • 1 tablespoon milk
  • 1 egg
  • 2 cups all-purpose flour
  • ⅔ cups unsweetened cocoa
  • ¼ teaspoon salt
  • ¼ teaspoon baking powder
  • ¼ teaspoon baking soda
  • 1 bag (12 oz) chocolate chips (milk or semi-sweet)
  • 1 teaspoon vegetable shortening
  • LOTS of nonpareil sprinkles. 2-3 large bottles.
Instructions
  1. Heat oven to 350 F.
  2. Cream together the butter and sugar.
  3. Add the vanilla, milk, and egg, and beat well.
  4. Add the dry ingredients (slow down there, Tiger...the cocoa will fly everywhere! Beat it on low until it's incorporated) and mix together well.
  5. For best results, roll out between two pieces of parchment until it's about ¼" thick.
  6. Cut with a small round cookie cutter, or improvise with a shot glass or a plastic cap. With a spatula, lift the rounds carefully and place ½"-1" apart on ungreased bafking sheet. Bake for 12 minutes. The cookies should be fairly firm. If they're still soft, give them another minute or two. They'll harden a bit as they cool.
  7. Allow the cookies to sit on the baking sheet for a couple of minutes and then transfer to a wire rack to cool completely.
  8. Once cool, melt the chocolate chips and shortening together in the microwave at 15 second increments, stirring each time. Dip the tops of the cookies in the chocolate, gently shake off excess, and then press into a separate bowl of sprinkles. Place on waxed paper and move to the refrigerator to set. (Approximately 15 minutes.)

This is a wonderful basic cookie recipe to have on hand. The cookies keep their shape very well, so they’re perfect for a sandwich cookie. Fill them with peanut butter frosting, marshmallow fluff, mint ganache…wherever your imagination takes you!

Roll the dough out between two sheets of parchment

Roll the dough out between two sheets of parchment

Cut out small circles (I used a shot glass)

Cut out small circles (I used a shot glass)

Dip them in the chocolate...

Dip them in the chocolate…

And then dip them into the nonpareil sprinkles.

And then dip them into the nonpareil sprinkles.

MiscDec2013 010

Next week will be the big push to make and bake for Christmas platters. Stay tuned…lots of goodies are in the works.