Chewy Chocolate Cherry Cookies

Chewy Chocolate Cherry Cookies The Rowdy BakerWith a soft, chewy texture that lies somewhere between a cookie and a brownie, this explosion of dark chocolate and maraschino cherry will satisfy you right down to your toes. And yes, I get a little bit passionate about cherries!


The Rowdy Baker loves her some cherries!

The Rowdy Baker loves her some cherries!

This recipe is a little fussier than a normal cookie recipe – more ingredients, a few extra steps – but it’s well worth the effort, especially for a holiday like Valentine’s Day.

Chewy Chocolate Cherry Cookies
Print
Author:
Makes 4-5 dozen These cookies get softer and more flavorful after 24 hours!
Ingredients
  • 1 cup (2 sticks) butter
  • 6 ounces unsweetened chocolate
  • 1½ cup white sugar
  • 1 cup brown sugar, firmly packed
  • 1 tablespoon vanilla
  • ¼ cup buttermilk
  • 4 eggs, room temperature
  • 3½ cups all purpose flour
  • 1 teaspoon baking powder
  • ¼ teaspoon baking soda
  • ½ teaspoon salt
  • ½ cup mini chocolate chips (or finely chopped chocolate)
  • ½ cup chopped walnuts - more if desired
  • 1 10-oz jar maraschino cherries
  • ICING:
  • ⅓ cup heavy cream
  • 2 ounces unsweetened chocolate
  • 2 tablespoons maraschino cherry juice or ¼ teaspoon cherry flavoring (optional)
  • 1 cup powdered sugar
  • decorate with maraschino cherries, sprinkles, chopped nuts
Instructions
  1. Heat oven to 350 F. Lightly grease two baking sheets (or cover with parchment)
  2. Drain cherries, reserving 2 tablespoons for icing, if desired. Chop cherries into small pieces and set aside. (Don't press or dry the chopped cherries...a little juice is fine.)
  3. In a medium pan, melt butter and unsweetened chocolate together on low heat. Stir frequently. When chocolate is completely melted, remove from heat and stir.
  4. Add white sugar and brown sugar to the butter mixture and stir well.
  5. Add vanilla and buttermilk, stirring until combined.
  6. Put mixture into a large bowl. Add eggs and beat on medium speed for 1 minute.
  7. Add flour, baking powder, baking soda, and salt, and mix just until dry ingredients are incorporated.
  8. Add chocolate chips, walnuts, and chopped cherries.
  9. With cookie scoop or by rounded tablespoon, drop dough at least 1 inch apart on prepared baking sheet. (Don't chill this dough. Bake the cookies right away, or scoop onto baking sheets and freeze for later.)3-4 minutes before moving to the rack to cool completely. Ice and decorate cookies.
  10. ICING:
  11. In a medium pan, heat the cream, chocolate, and cherry juice on low, stirring frequently until chocolate is melted. Remove from heat and stir well, until completely smooth. Gradually add the powdered sugar and beat until smooth and creamy. Let icing sit, stirring occasionally, until thick enough to spread without dripping...about 1 hour. (This will vary, depending on the temperature of your house.)

Note: Bake these right away. If you let the dough sit too long or put it in the fridge, it will set up like soft fudge!  If you don’t want to bake them all, I suggest scooping the dough onto baking sheets and freezing for later.

Chop those cherries!

Chop those cherries!

Melt the butter and chocolate.

Melt the butter and chocolate.

Add the sugars and stir like crazy!

Add the sugars and stir like crazy!

Stirring in the chocolate chips, nuts, and cherries.

Stirring in the chocolate chips, nuts, and cherries.

Scoop onto prepared sheet - parchment for this batch.

Scoop onto prepared baking sheet – parchment for this batch.

Baked. Aren't they pretty?

Baked. Aren’t they pretty?

And now, for the icing!

Gently melt the chocolate and cream (and maybe a little cherry juice) for the icing.

Gently melt the chocolate and cream (and maybe a little cherry juice) for the icing.

Whisk in the powdered sugar until it's velvety smooth.

Whisk in the powdered sugar until it’s velvety smooth.

Dollop (best for cherries) or spread (best for sprinkles) the icing.

Dollop (best for cherries) or spread (best for sprinkles) the icing.

Admire your creations before they disappear!

Admire your creations before they disappear!

Here’s another idea: Buy some glass candle holders from the dollar store and serve individual cookies at each place setting. Pretty classy, huh?Chewy Chocolate Cherry Cookies individually served The Rowdy Baker

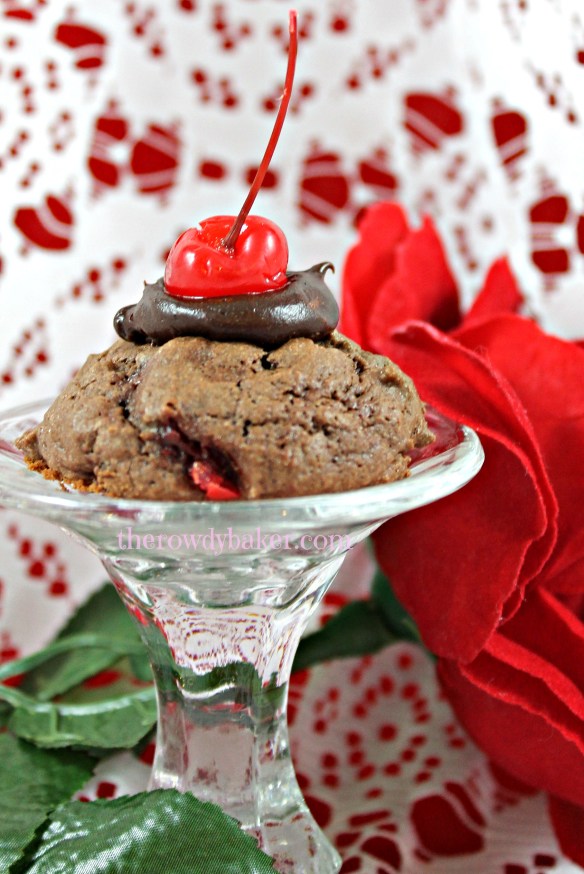
So many cherries, so little time. I’m not sure why I bought a gallon of the things…guess I forgot the advice to “never shop hungry”!

Lorinda

My Big Fat Molasses Buttermilk Cookies!

my big fat molasses cookies titledYou might need to find a locking cookie jar for these flavorful molasses cookies, because even though they are huge, one is not enough; at the very least, you need one for each hand!handful

These are very similar to the “Grandma Cookies” I adored in my younger days, though Grandma used sour cream instead of buttermilk, and was a little more frugal with the spices. I like to add the brilliant flavor of fresh ginger, too. They’re still milder than a gingersnap – closer to gingerbread. If you love spicy cookies, bump up the amount of spices a bit.

Glaze is mandatory, in case you were wondering.my big fat molasses buttermilk cookies The Rowdy Baker

I know this makes a large batch of dough, but since the cookies are so big, a regular-sized batch would only make something like 8 cookies – or a bunch of wimpy, sissy cookies. Pffft.

Make a pile of these – you won’t be sorry! Here’s what you’ll need:ingredients

TIPS:

  • Peel ginger before grating. The easiest way to do this is to scrape it with a spoon or the back of a table knife. Grate the juicy flesh, but stop when it gets too stringy.
  • If you don’t have fresh ginger, ground ginger is a perfectly acceptable substitute.
  • I don’t like to use shortening either, but in this case I make an exception. You can use all butter, but the cookies will flatten out more.
  • Make sure you thoroughly chill the dough before rolling, and use plenty of flour (I dump flour on a piece of parchment) for rolling.
  • Hate to roll out dough?  You can use a large cookie scoop instead, though the resulting cookies might not be quite as pretty.
  • When you cut the cookies out, plan your cookie cutter placement with engineering precision – then move the scraps to a separate pile as you work. When the “first run” cookies are cut out, roll all of the scraps at once. Each time you roll out the dough, the cookies will get a little drier…and you don’t want that! (Though extra glaze can hide any flaws.)
  • If possible, treat the dough like biscuit dough – lift the cookie cutter straight up instead of twisting it. This will make it easier for the cookies to puff up.
My Big, Fat, Molasses Buttermilk Cookies!
Print
Author:
Ingredients
  • ¾ cup (1½ sticks) butter, softened
  • ¾ cup shortening
  • 2 cups packed brown sugar
  • 1 heaping tablespoon fresh ginger, finely grated (or add 1 teaspoon ground ginger with dry ingredients)
  • 3 eggs
  • 1 cup molasses
  • 1 cup heavy buttermilk (I use Bulgarian)
  • 4 teaspoons baking soda
  • 7 cups all purpose flour
  • 1 tablespoon ground cinnamon (more to taste)
  • 1 teaspoon ground cloves
  • ¾ teaspoon salt
  • GLAZE:
  • 1½ cup powdered sugar
  • 2 tablespoons meringue powder (optional - makes a more brittle icing)
  • Water (3-4 tablespoons)
Instructions
  1. In a large bowl, beat together the butter, shortening, brown sugar, and ginger well.
  2. Add eggs and beat until light and fluffy.
  3. In a medium bowl (mixture will expand) combine molasses and buttermilk, mixing until completely blended. Stir in the baking soda.
  4. In a medium bowl, combine the flour and spices.
  5. Beginning with the dry ingredients and ending with the wet ingredients, add alternately (approximately ⅓ at a time) to mixture in the bowl, beating and scraping the bowl down after each addition.
  6. Chill dough for at least 3 hours - overnight is even better.
  7. Heat oven to 375 F.
  8. Place half the dough on a very heavily floured surface, turning the dough to coat with flour and forming into a ball.
  9. Roll dough out to about ⅓-inch thick. Cut into circles, using a 3-inch cookie cutter.
  10. With a spatula, lift each round one at a time, placing in the palm of your hand. Lightly flip the cookie from one hand to the other, dusting off extra flour, and place 2 inches apart on ungreased baking sheet.
  11. Bake for approximately 10-11 minutes. Cookies should be starting to brown on the bottom but will still feel soft on top. Place baking sheet on a cooling rack and allow the cookies to cool for 5 minutes before transferring them to a rack to cool completely.
  12. FOR GLAZE: Place powdered sugar and meringue powder in a small bowl. Drizzle water into dry ingredients a little at a time, whisking continuously until it creates a thin glaze.
  13. Brush over cooled cookies and allow to dry completely before storing.
Grate some juicy, fresh ginger. (Yes, yes...you can use powdered instead.)

Grate some juicy, fresh ginger. (Yes, yes…you can use powdered instead.)

Beat butter, shortening, sugar, ginger. Add eggs and beat until light.

Beat butter, shortening, sugar, ginger. Add eggs and beat until light.

Stir baking soda into molasses and buttermilk. Add alternately with dry ingredients.

Stir baking soda into molasses and buttermilk. Add alternately with dry ingredients.

Coat chilled dough with flour and roll out to about 1/3-inch.

Coat chilled dough with flour and roll out to about 1/3-inch.

Flip dough from hand to hand to dust off extra flour.

Flip dough from hand to hand to dust off extra flour.

Bake and glaze.

Bake and glaze.

ENJOY!

ENJOY!

I’m not much of a cookie dunker, but I didn’t want to waste the cookies that were being dunked and photographed, so I heroically ate them. Oh, man. I’ve got to tell you: these cookies are flat MADE for dunking!

One bite and I’m back in Grandma’s kitchen, wiping clean dishes and bowls while the cookies baked. Heaven. Pure heaven!

Lorinda


“Pecan Pie” Shortbread Cookies

pecan pie shortbread cookies candles watermarkedSee these sweet little pecan pie slices? They’re actually shortbread cookies, but they pack a lot of pecan pie flavor into a two-bite treat!

The “crust” is regular shortbread. The “filling” is enhanced with toasted pecans, brown sugar, and molasses. For a cute touch, a little white chocolate is added to resemble whipped cream. These are incredibly addictive! The recipe makes 48 small cookies, but you may want to double it and freeze some for later.Pecan Pie Shortbread Cookies - The Rowdy Baker

Don’t forget to toast the pecans before you add them. It’s easy – just toss them in a skillet on medium low for about 5 minutes, stirring often, or microwave them, for 90 seconds on high, stirring every 30 seconds. It makes a huge flavor difference – it really does!

"Pecan Pie" Shortbread Cookies
Print
Author:
Makes 48 petite cookies. If you have time, double the recipe; they'll go fast!
Ingredients
  • 1 cup (2 sticks) butter, room temperature
  • 1 cup powdered sugar
  • 1 egg yolk
  • ½ teaspoon vanilla
  • ⅛ teaspoon salt
  • 2 cups all-purpose flour
  • ½ cup cornstarch
  • 1½ cups chopped TOASTED pecans, divided
  • 1 tablespoons flour
  • 2 tablespoons brown sugar
  • 1 Tablespoon molasses
  • White chocolate (optional for decoration)
Instructions
  1. Heat oven to 350 F.
  2. In a large bowl, beat together the butter and powdered sugar until smooth and creamy.
  3. Add the egg yolk, vanilla, and salt. Mix well, scraping sides of bowl.
  4. Add the 2 cups of flour and the cornstarch, and mix until completely incorporated. (This will be a stiff dough. You may need to use a dough hook or your hands.)
  5. Separate the dough in half. Remove ½ cup of dough from ONE half and add it to the other. Set aside and cover the large piece of dough, and put the smaller piece back into the mixing bowl.
  6. To the dough in the mixing bowl, add 1 cup of the chopped pecans, 1 tablespoon flour, brown sugar, and molasses. Mix well.
  7. Roll the vanilla dough out between two large pieces of parchment paper, about ⅛-inch thick.and cut out 6 large circles – about 4-1/2 inches across – using a small bowl, sour cream container, or margarita glass! (Alternatively, you can divide dough into 6 balls and roll each individually between parchment.) Place them on a plate and keep them covered with plastic wrap. It’s fine to re-roll the dough as long as you’re rolling it between sheets of parchment.
  8. Divide the pecan dough into 6 balls, and flatten into approximately 3-inch circles.
  9. Working with one piece of each color at a time (keep the rest covered so it won’t dry out) center the pecan circle over the vanilla circle. There should be about ½-inch of vanilla showing around the pecan filling. Slowly bring the vanilla dough up the sides. A knife or spatula works very well for this. Don’t worry if it cracks around the bottom edge. This isn’t pie crust! Use your fingers to press and mold the dough (think Play Doh) until it’s fairly straight and even all the way around the top, Use your fingers to press firmly down on the "filling" while you bring the dough around it. The vanilla dough should stick up a little higher than the pecan dough.
  10. Crimp the dough all the way around, using the tips of your fingers. Don’t be afraid to press firmly along the sides as you go – this will keep the fluted edge from falling off as it bakes.
  11. Sprinkle each "pie" with the remaining chopped pecans.
  12. With a sharp knife, cut pie into 8 small wedges. Move to an ungreased cookie sheet, spaced at least ½-inch apart. Repeat until the baking sheet is full. The cookies can be quite close together; they don’t spread.
  13. Place pan in the freezer for 15 minutes or the refrigerator for 30 minutes.
  14. Bake for approximately 10 minutes, or until the bottoms are just turning light golden brown. Move to a rack to cool.
  15. Once cool, add a dollop of melted white chocolate to the top if desired.

It will look crumbly and seem dry, but if you keep mixing it will turn into this!

At first the mixture will look crumbly and seem dry, but if you keep mixing it will turn into this!

"Crust" on the left, "Filling" on the right.

“Crust” on the left, “Filling” on the right.

Use a knife or spatula to lift the vanilla dough around the filling.

Use a knife or spatula to lift the vanilla dough around the filling.

Crimp the edges. (My pinky finger was just the right size.)

Crimp the edges. (My pinky finger was just the right size.)

Press chopped pecans firmly on top.

Press chopped pecans firmly on top.

Cut into 8 wedges.

Cut into 8 wedges.

Place on baking sheet and pop them in the oven!

Place on baking sheet and pop them in the oven!

pecan pie shortbread cookies vertical watermarked

I also tried this idea with other pie flavors. I tried to put them all into one blog, but the recipes differed just enough to make that impossible. So…here’s the link for “Chocolate Pie” Shortbread cookies. and “Pumpkin Pie” Shortbread cookies.

Betcha can’t eat just one…

Lorinda

“Pumpkin Pie” Shortbread Cookies

pumpkin pie shortbread cookies holding watermarkedTender shortbread cookies, made to look like tiny slices of pumpkin pie, make a perfect hostess gift for Thanksgiving – or just a fun treat to nibble on!

I’ve been obsessed with pie-cookies lately, and finally narrowed down my posts to three seasonal flavors: “Pecan Pie” Shortbread cookies. and “Chocolate Pie” Shortbread cookies., and these pretty Pumpkin Pie Shortbread Cookies. Make all three for a beautiful Thanksgiving display, and freeze any leftovers. pumpkin pie shortbread cookies watermarked


"Pumpkin Pie" Shortbread Cookies
Print
Author:
Makes 48 petite cookies. If you have time, double the recipe; they'll go fast!
Ingredients
  • 1 cup (2 sticks) butter, room temperature
  • 1 cup powdered sugar
  • 1 egg yolk
  • ½ teaspoon vanilla
  • ⅛ teaspoon salt
  • 2½ cups flour - DIVIDED
  • ½ cup cornstarch
  • ⅓ cup solid pack pumpkin
  • 2 tablespoons brown sugar
  • 2 teaspoons cinnamon
  • ½ teaspoon ginger
  • ¼ teaspoon allspice
  • ¼ teaspoon nutmeg
  • White chocolate for decorating, if desired
Instructions
  1. Heat oven to 350 F.
  2. In a large bowl, beat together the butter and powdered sugar until smooth and creamy.
  3. Add the egg yolk, vanilla, and salt. Mix well, scraping sides of bowl.
  4. Add 2 cups flour (reserve remaining ½ cup for the "filling"), and cornstarch, and mix until completely incorporated.
  5. Remove half of the dough and place it in a small bowl.
  6. To the dough in the large bowl, add pumpkin, brown sugar, ½ cup flour, and spices Mix well.
  7. Roll the vanilla dough out between two large pieces of parchment paper, about ⅛-inch thick, and cut out 6 large circles – about 4-1/2 inches across – using a small bowl, sour cream container, or margarita glass! Place them on a plate and keep them covered with plastic wrap. It’s fine to re-roll the dough as long as you’re rolling it between sheets of parchment. (Alternatively, you can separate the dough into 6 equal balls and roll them out separately between parchment. Any scraps left over are handy for patching up thin spots while shaping pies.)
  8. Separate the pumpkin dough into 6 portions and roll them into balls, then flatten until they're approximately 3" circles.
  9. Working with one piece of each color at a time (keep the rest covered so it won’t dry out) center the pumpkin circle over the white circle. There should be at least ½-inch of white dough showing around the pumpkin. Slowly bring the white dough up the sides. A knife or spatula works very well for this. Don’t worry if it cracks around the bottom edge. This isn’t pie crust! Use your fingers to press and mold the dough (think Play Doh) until it’s fairly straight and even all the way around the top, Press firmly down on the "filling" while you bring the dough around it. The white dough should stick up a little higher than the pumpkin dough.
  10. Crimp the dough all the way around, using the tips of your fingers. Don’t be afraid to press firmly along the sides as you go – this will keep the fluted edge from falling off as it bakes.
  11. With a sharp knife, cut pie into 8 small wedges. Move to an ungreased cookie sheet, spaced at least ½-inch apart. Repeat until the baking sheet is full. The cookies can be quite close together; they don’t spread.
  12. Place baking sheet in the freezer for 15 minutes, or refrigerate for 30 minutes.
  13. Bake for approximately 10 minutes, or until the bottoms are just turning light golden brown. Move to a rack to cool.
  14. When all cookies are cool, add a dollop of melted white chocolate to the top.

It will look dry and crumbly, and you may think it will never come together - but eventually it looks just like this!

It will look dry and crumbly, and you may think it will never come together – but eventually it looks just like this!

Ready to roll!

Ready to roll!

Roll and cut vanilla dough, OR separate into 6 balls and roll each individually.

Roll and cut vanilla dough, OR separate into 6 balls and roll each individually.

Bring the sides up around the pumpkin "filling"

Bring the sides up around the pumpkin “filling”

Crimp the edges and cut into 8 slices

Crimp the edges and cut into 8 slices

Ready to bake!

Ready to bake!

Pumpkin pie shortbread cookies horiz watermarked

And that, I believe, is my last pumpkin recipe for the year.

Probably.

We’ll see……….

Lorinda


“Chocolate Pie” Shortbread Cookies

Chocolate pie shortbread cookiesThese sweet little cookies look just like miniature pieces of chocolate cream pie!

I made Chocolate Pie Shortbread Cookies last year for Tampa Cake Girl’s Cookie Exchange, which was a super fun idea, with lots of great recipes.The original batch made 96 cookies, and I have to admit I got a little tired of making them. So…I halved the batch for this post. Feel free to double it up again if you have more perseverance than I.

Half of the dough will remain plain; the other half will be enhanced with chocolate. There is no actual filling – the cookie is just gussied up to look and taste like chocolate pie filling. Pipe a little white chocolate on each piece to resemble whipping cream, and you have a sweet little treat that’s almost too cute to eat. (Holy cow, did I just write a poem?)Chocolate pie shortbread cookies and tea watermarked

They’re petite…perfect two-biters. Dainty enough for a ladies’ luncheon, but my hubby was happy to eat them by the handful – and yes, they are just one-biters as far as he’s concerned.  It’s a good thing this recipe makes 4 dozen pieces!

This is very heavy dough, so if you have a stand mixer, I recommend you use it. You may need to use the dough hook when the flour is added.

"Chocolate Pie" Shortbread Cookies
Print
Author:
Make 48 petite cookies. If you have time, double the recipe; they'll go fast!
Ingredients
  • 1 cup (2 sticks) butter, room temperature
  • 1 cup powdered sugar
  • 1 egg yolk
  • ½ teaspoon vanilla
  • ⅛ teaspoon salt
  • 2 cups all-purpose flour
  • ½ cup cornstarch
  • 1 teaspoon heavy cream
  • ⅛ cup unsweetened cocoa powder
  • White chocolate and dark chocolate (optional)
Instructions
  1. Heat oven to 350 F.
  2. In a large bowl, beat together the butter and powdered sugar until smooth and creamy.
  3. Add the egg yolk, vanilla, and salt. Mix well, scraping sides of bowl.
  4. Add flour and cornstarch, and mix until completely incorporated.
  5. Remove half of the dough and place it in a small bowl.
  6. To the dough in the large bowl, add 1 teaspoon cream and the cocoa powder. Mix well. Cover the large bowl with plastic wrap and set aside.
  7. Roll the vanilla dough out between two large pieces of parchment paper, about ⅛-inch thick, and cut out 6 large circles – about 4-1/2 inches across – using a small bowl, sour cream container, or margarita glass! Place them on a plate and keep them covered with plastic wrap. It’s fine to re-roll the dough as long as you’re rolling it between sheets of parchment. (Alternatively, you can separate the dough into 6 equal balls and roll them out separately between parchment.)
  8. Separate the chocolate dough into 6 portions and roll them into balls, then flatten until they're approximately 3" circles.
  9. Working with one piece of each color at a time (keep the rest covered so it won’t dry out) center the chocolate circle over the vanilla circle. There should be at least ½ vanilla dough showing around the chocolate. Slowly bring the vanilla dough up the sides. A knife or spatula works very well for this. Don’t worry if it cracks around the bottom edge; this isn’t pie crust! Use your fingers to press and mold the dough (think Play Doh) until it’s fairly straight and even all the way around the top, Use your fingers to press firmly down on the "filling" while you bring the dough around it. The vanilla dough should stick up a little higher than the chocolate dough.
  10. Crimp the dough all the way around, using the tips of your fingers. Don’t be afraid to press firmly along the sides as you go – this will keep the fluted edge from falling off as it bakes.
  11. With a sharp knife, cut pie into 8 small wedges. Move to an ungreased cookie sheet, spaced at least ½-inch apart. Repeat until the baking sheet is full. The cookies can be quite close together; they don’t spread. Place baking sheet in the freezer for 15 minutes, or refrigerate for 30 minutes.
  12. Bake for approximately 10 minutes, or until the bottoms are just turning light golden brown. Move to a rack to cool.
  13. When all cookies are cool, frost the tops with melted chocolate if desired. Refrigerate briefly to set the chocolate. Add a dollop of white chocolate to the top.

half vanilla, half chocolate

half vanilla, half chocolate

Roll out "crust". You could also opt to divvy the dough into 6 balls and roll out each piece.

Roll out “crust”. You could also opt to divvy the dough into 6 balls and roll out each piece.

Flatten chocolate ball and place in the center.

Flatten chocolate ball and place in the center.

Press the sides firmly against the chocolate.

Press the sides firmly against the chocolate.

Flute the edges...

Flute the edges…

Cut into 8 wedges

Cut into 8 wedges

Place on baking sheet, chill briefly, and bake.

Place on baking sheet, chill briefly, and bake.

Add a little melted chocolate

Add a little melted chocolate

A bit of white chocolate and they're ready to go!

A bit of white chocolate and they’re ready to go!

Just for fun, I tried this idea with other pie flavors. I tried to put them all into one blog, but the recipes differed just enough to make that impossible. So…here’s the link for “Pecan Pie” Shortbread cookies. and “Pumpkin Pie” Shortbread cookies.

I may be going a little crazy here, but there may be key lime, lemon meringue, cherry, berry, and peanut butter pie cookies in the future; I’m having too much fun to quit!

Lorinda


Butter Rum Apple Cookies

butter rum apple cookies horizontalEnvision a cookie that is as light as a cake and filled with toasted nuts and soft bits of apple, and then imagine the fragrance of butter rum, cinnamon, nutmeg, and cloves wafting through your house as you pull them from the oven. This is one of those times when the reality is every bit as good as the fantasy.

My husband is not known for his effusive compliments, so when he told me “I can NOT STOP eating them…they’re that good!”, I knew my recipe was blog-worthy.

There’s no actual rum in these cookies, though if you wanted to add a little pizazz, you could substitute rum for some of the water in the icing. The flavor comes from using hot buttered rum mix in place of the sugar, butter, and spices.

You have a choice here. You can use:

    • Store bought mix. If you go this route, make sure you buy one that has butter as one of the main ingredients. The brand I bought had sugar as the first ingredient, and butter as the second. It was really delicious…and convenient!  OR:
    • My easy-peasy Hot Buttered Rum Mix.

The benefit of using my recipe for hot butter rum mix?  You will still have enough batter left for about 10 mugs of hot buttered rum! That’s a no-brainer, right? Oh, and you’ll save money.

Butter Rum Apple Cookies

Butter Rum Apple Cookies

Here’s what you’ll need. I love the flavor of the toasted pecans in these cookies, but you can use walnuts if you’d prefer. Either way, toasting them briefly will make a huge difference. I like to cook mine slowly in a skillet on the stove, but the microwave works too. 90 seconds to 2 minutes works well in my microwave (stirring several times) but some people cook them much longer.

ingredients for Butter Rum Apple Cookies

It’s a super easy recipe. The hardest thing you’ll have to do is peel, core, and chop the apple!

Butter Rum Apple Cookies
Print
Author:
Makes 30-36 cookies.
Ingredients
  • 1 cup hot buttered rum mix - slightly softened (make sure you use a mix that has butter as a main ingredient)
  • 1 large egg
  • ½ cup sour cream
  • 2 cups chopped apple (peeled and cored)...about 1 large apple or 2 small
  • 1 cup lightly toasted pecans or walnuts, chopped
  • 2 cups flour
  • 1 teaspoon baking soda
  • ½ teaspoon baking powder
  • ½ teaspoon salt
  • GLAZE (optional)
  • 11/2 cups powdered sugar
  • 1 teaspoon vanilla
  • 2 teaspoons meringue powder (Optional - this will just keep the glaze firmer during storage.)
  • Water
Instructions
  1. Heat oven to 375 F.
  2. Cover baking sheet with parchment (or very lightly grease it).
  3. In a large bowl, beat together the Hot Buttered Rum mix, the egg, and the sour cream until combined.
  4. Add the remaining ingredients all at the same time. Mix until incorporated.
  5. For round cookies, use a cookie scoop. Otherwise, drop by slightly rounded tablespoons onto prepared baking sheet.
  6. Bake for 10-12 minutes, or until cookie begins to lightly brown.
  7. Move cookies from baking sheet to cooling rack. Cool before adding glaze.
  8. GLAZE:
  9. Whisk together powdered sugar, vanilla, meringue powder, if using, and slowly drizzle in enough water (or rum!) to make a fairly thin glaze. Brush or spoon over cool cookies.
  10. Keep loosely covered in a cool location.

So easy. Once the rum mix, egg, and sour cream are combined, just dump the rest in!

So easy. Once the rum mix, egg, and sour cream are combined, just dump the rest in!

Drop by rounded tablespoons.

Drop by rounded tablespoons.

Mmmmm...can you smell them?

Mmmmm…can you smell them?

Spoon it on...

Spoon it on…

...or brush it on.

…or brush it on.

Butter Rum Apple Cookies - enjoy!

Butter Rum Apple Cookies – enjoy!

The cookies are soft and moist, so I’d recommend that you loosely cover them with foil so the glaze doesn’t get sticky. As with any spicy cookie, the flavor improves over the next day or two – if you can protect them from invaders for that long!

Lorinda


Pumpkin Pecan Pinwheels


pumpkin pecan spiralsThis year I’m greeting Fall with hot coffee in one hand and a Pumpkin Pecan Pinwheel in the other!

These aren’t slam-dunk cookies to make in a hurry, no sirree. These are “impress-your-mother-in-law” cookies, not something to throw together before the kids get home from school in an hour.

It’s not that they’re difficult to make – they’re just a little time consuming because this dough must be chilled thoroughly before baking. You’ll have to mix the two batters and chill them for two hours, roll them up together and freeze for one hour before slicing and baking.

In this case, patience will be rewarded with gorgeous spicy pumpkin cookies with a swirl of chewy pecan…worth the effort, right?


Pumpkin pecan pinwheels horiz

The pecan filling is sort of magical. It gets spread out on the rolled up pumpkin cookie dough, and is – well – sloppy looking. Even after being sent to the freezer for an hour time-out, it oozes a bit when you slice the roll, and it’s hard not to think you’ve really messed up. Trust me! The egg whites in the pecan mixture cause it to puff up just perfectly, holding the cookie together in a most delicious way.

The meringue-like filling puffs and fills the spiral.

The meringue-like filling puffs and fills the spiral.

I like to put a light glaze on the cookies after they’ve cooled. Simply whisk water into 1/2 cup of powdered sugar until it’s fairly thin, then brush it on each cookie. Allow the glaze to dry completely before you put the cookies into an airtight container.

Here’s something I learned about these cookies: THEY TASTE MUCH BETTER THE SECOND DAY! Seriously, they do. Tuck them into an container or put them on a plate and cover them with foil or plastic wrap. The flavors blend and are more intense on Day 2, and they’re also softer. So now I guess what I’m telling you (I know…bossy, bossy, bossy) is that you not only have to plan on having plenty of time to make the cookies, you should plan ahead and make them a day before you need them.

Still worth it!

Pumpkin Pecan Pinwheels
Print
Author:
This recipe makes 18 large cookies, or 24 medium cookies. Make sure you have plenty of time for the chilling process, and remember that they taste even better the second day!
Ingredients
  • COOKIE DOUGH:
  • ¾ cup butter, softened
  • ¾ cup white sugar
  • ¼ cup brown sugar
  • 1 egg
  • 1 teaspoon vanilla
  • 3 cups all-purpose flour
  • ½ teaspoon salt
  • ½ teaspoon baking powder
  • ½ teaspoon baking soda
  • 1½ teaspoons cinnamon
  • ½ teaspoon ginger
  • ¼ teaspoon allspice
  • ⅛ teaspoon ground cloves
  • ½ cup solid-pack pumpkin
  • ¼ cup sour cream
  • PECAN FILLING:
  • 1 large egg and 2 egg whites
  • ½ cup sugar
  • ½ teaspoon vanilla
  • Pinch salt
  • 2 cups finely chopped, toasted pecans (Toast by stirring in a skillet over low heat for 5 minutes or in the microwave for 90 seconds, stirring several times.)
  • GLAZE (optional)
  • 1 cup powdered sugar
  • Water
Instructions
  1. COOKIE DOUGH:
  2. In a large bowl, thoroughly cream the butter, white sugar, and brown sugar.
  3. Add egg and vanilla and mix well.
  4. Sift the dry ingredients together.
  5. Stir the pumpkin and sour cream together.
  6. Beginning with the dry ingredients and ending with the wet, add alternately, scraping bowl each time.
  7. Dough will be very soft and sticky. Place in a small bowl, cover, and chill for at least 2 hours.
  8. PECAN FILLING:
  9. Beat egg and egg whites until frothy.
  10. Gradually add sugar, beating constantly. Beat for 3 minutes. (Important - don't skip this step!)
  11. Add vanilla, salt, and pecans and stir well.
  12. Cover and refrigerate for at least 2 hours.
  13. On generously floured parchment, roll dough into 10-inch by 13-inch rectangle.
  14. Stir pecan mixture and spread over the dough, almost to the edges.
  15. For large cookies, begin rolling from the short end. For smaller cookies, begin rolling from the long end, brushing excess flour from the roll as you proceed.
  16. Roll up in the parchment and place the roll on a baking sheet. Put in the freezer for 1 hour.
  17. Heat oven to 375 F.
  18. With a sharp knife, cut into slices approximately ¼-inch to ⅓-inch thick and place on parchment covered baking sheet. Gently coax any flat sides into a round shape!
  19. Bake for approximately 14 minutes, or until light golden brown.
  20. Cool on baking rack.
  21. When cool, combine enough water with the powdered sugar to make a thin glaze. Brush onto cookie with a pastry brush. Allow cookies to dry completely before sealing in container.

Make sure you toast the pecans; then chop them finely.

Make sure you toast the pecans; then chop them finely.

Spread the pecan mixture on the rolled dough.

Spread the pecan mixture on the rolled dough.

Roll, roll, roll!

Roll, roll, roll!

Baked to a delicate golden brown.

Baked to a delicate golden brown.

See? Not hard at all. I’m thinking they’d be wonderful dunked in hot cocoa; I may have to give that a try.
Happy Fall! Hang around, because I’ve had one of those middle of the night brainstorms that may come together soon. Hope so, because it involves apples. And pastry. And caramel. And, hint: it’s not a pie.

Lorinda

Brownies for a Crowd

brownie croppedThe other day I needed to make lots and lots of brownies…enough for 60 women. And because “good enough” just doesn’t cut it for our Homemakers’ Club annual spring tea, I also felt the urge to gussy them up and make them pretty.

brownies for tea watermark

I usually use a mixture of oil and butter in my brownies, but I wanted these to be rich and decadent, so I skipped the oil and used lots of butter. They turned out even better than I’d hoped, with enough height to look impressive, and a density somewhere between fudge brownies and cake brownies.

If you don’t have a crowd to cook for, you could cut the recipe in half of course. But I’d go for the full recipe and freeze some if I were you; they’re that good!


Brownies for a Crowd
Print
Author:
Makes approximately 72 brownies, 1½-inch by 2-inches each.
Ingredients
  • 6 cups sugar
  • 2¼ cups (4½ sticks) butter, melted
  • 9 eggs
  • 1 tablespoon vanilla
  • 1½ cup unsweetened cocoa powder
  • 1 cup "Special Dark" cocoa powder
  • 3 cups all-purpose flour
  • 1 teaspoon baking soda
  • 1 teaspoon baking powder
  • 1 teaspoon salt
  • 1 cup mini semi-sweet chocolate chips
  • 1 cup chopped walnuts (more if desired)
Instructions
  1. Heat oven to 350 F.
  2. Lightly grease two 9-inch by 13-inch baking pans, line with parchment, (the grease will hold the parchment in place) and spray lightly with an oil/flour combination spray like Baker's Joy.
  3. In a very large bowl, combine the sugar and melted butter. Stir well.
  4. In a medium bowl, beat the eggs and vanilla until frothy. Add slowly to the sugar mixture, stirring well.,
  5. Add the cocoa powders, flour, baking soda, baking powder, and salt. Stir just until combined.
  6. Gently stir in the chocolate chips and walnuts.
  7. Divide evenly between baking pans, spreading with a dough scraper or offset spatula.
  8. Bake for 25-30 minutes, or until a toothpick in the center of the brownies comes out clean. If it has batter on it, bake in 3 minute increments until done. Don't overbake.
  9. Cool COMPLETELY in pans on cooling racks. Remove the brownies by lifting the edges of the parchment. Mark and cut as desired. Since they are thick and rich, I found that 1½-inch by 2-inch pieces were perfect.

Spreading batter. (I used one huge pan, 13" x 18")

Spreading batter. (I used one huge pan, 13″ x 18″)

I was so busy slam-dunking this project, I failed to take pictures as I went. But the decorations were pretty simple for the most part. A swirl of chocolate buttercream icing (ganache would be great, too!) a few buttercream roses and leaves, and nifty little edible flowers and butterflies I got from Sugar Robot. There is no sugar in them, so they were perfect as decorations for the batch of sugar-free brownies I also made.

jelly bean beeThe little bees were simple and fun to make. To make a bee I used two jelly beans – a yellow one for the body and a “ginger ale” jelly bean for the head and wings. (White would do nicely, too.) I melted a little white chocolate in a small dish to use as glue, then cut the end off of one of the lighter beans for a head and glued it to the end of a yellow bean, using the white chocolate. Then two more thin slices of the light bean were attached to the sides for wings. You will need to hold them in place for a few seconds to let the white chocolate dry.

Melt a small amount of dark chocolate in a plastic zipper-type bag and snip a teeny tiny bit of one corner off. Dot eyes onto the head and then stripes on the back of the yellow bean. (The reason my stripes look a little wimpy is because I thought I’d try painting them with black paste food coloring. Not recommended!) That’s it. Let them dry for a few minutes before moving them onto the brownies.

Here’s how I know these brownies are the best I’ve made: usually, I prefer them with lots of chocolate icing, but I had some leftovers that didn’t get decorated, and I actually preferred them plain. Irresistible!

Happy spring…

Lorinda

Drunken Leprechaun Balls


leprechaun balls vertical with boozeYes, you read that correctly; I’m posting a recipe for Leprechaun Balls. There are so many jokes that will be left unsaid…probably.

These green confections are quite (ahem) firm – a cross between fudge and cookies. To make them you will need to bake a batch of green shortbread cookies, but trust me…the cookie recipe is very easy, and the balls are a slam dunk! What more could you ask for this St. Patrick’s Day?

My shortbread recipe makes a little more than you’ll need, so you should end up with 6-8 extra cookies to munch on. I tried rolling the dough out on a cookie sheet and baking it in one piece, which worked pretty well, but it’s harder to get the center of the dough cooked completely that way. So…I recommend you make cookies, even if they’re just squares of dough. You’ll be crushing most of them, so the shape doesn’t matter.

Drunken Leprechaun Balls
Print
Author:
Green shortbread is baked and crushed, then blended with Irish Cream Liqueur and Whiskey for a tasty adult treat. Makes about 36.
Ingredients
  • SHORTBREAD:
  • 1 cup (2 sticks) butter, room temperature
  • ¾ cup powdered sugar
  • 1 egg yolk
  • green food coloring
  • 2 cups all-purpose flour
  • 2 tablespoons cornstarch
  • ⅛ teaspoon salt
  • 1 tablespoon milk (if needed)
  • BALLS:
  • 3 cups crushed green shortbread (recipe above)
  • 1 cup chopped pecans
  • 1 cup powdered sugar
  • pinch salt
  • 2 tablespoons corn syrup
  • ¼ cup Baileys (or other Irish Cream Liqueur)
  • 2 tablespoons Jameson (or other whiskey)
  • powdered sugar and green sugar for rolling cookies in
Instructions
  1. Heat oven to 350 F.
  2. In a large bowl (use a stand mixer if possible; this is very stiff dough) beat the butter until soft and creamy.
  3. Add powdered sugar and mix well.
  4. Add egg yolk and enough food coloring to create a deep green color, beating until mixture is light and fluffy. Scrape the sides of the bowl often.
  5. Add dry ingredients. (If using a stand mixer, you may want to switch to your dough hook.) The mixture will be very dry and stiff but should come together into a dough. If it isn't cooperating, add milk a little at a time until the dough comes away from the sides of the bowl and you can form it into a ball.
  6. Roll dough out to about ¼-inch thick and cut into cookie shapes. (You can also form into small balls and press with a cookie stamp if you prefer. ) Place close together on baking sheets and bake for approximately 10-12 minutes. If you see a tiny bit of brown along the bottom edges, they are done. Don't overbake them, because green cookies turn an unpleasant color if they brown.
  7. Cool cookies on a rack and crush in a bowl until you have 3 cups. Eat the rest!
  8. BALLS:
  9. Combine the crushed cookies, nuts, and powdered sugar in a medium bowl.
  10. Add the remaining ingredients and stir well.
  11. Roll scant tablespoons of dough into balls and roll them in a dish of powdered sugar and colored sugar.
  12. Refrigerate until firm. These can be served chilled, which will give them the texture of fudge, or at room temperature, which will make them a little softer.
  13. I'm sure you know this, but just for the record: DO NOT SERVE TO MINORS.

Combine dry ingredients, then stir in wet ingredients.

Combine dry ingredients, then stir in wet ingredients.

Roll the balls gently in your palms, then dust with sugar.

Roll the balls gently in your palms, then dust with sugar.

leprechaun balls vertical
By all means, improvise. Use walnuts instead of pecans, switch the booze around and use 1/4 cup of whiskey and 2 tablespoons of Irish cream (you may have to add a little more crushed cookie in this case), or roll them in coconut or sprinkles. Pop Rocks? Hmmmm.

Enjoy! And…hello? Keep ’em out of the reach of kiddies, of course.
Lorinda

For each petal on the shamrock this brings a wish your way. Good health, good luck, and happiness for today and every day. (Irish Blessing)


Valentine Treat Collection


vday collageI thought that while you were waiting anxiously for me to produce my promised Valentine’s Day Petits Fours, I’d pacify you with a collection of past V-Day treats. While you’re making all of these, I promise I’ll be working on a new post for you.
rowdy logo from brenna valentines
Try these delicious deep chocolate cookies! Chocolate Oatmeal Raisin Cookies have a little kick of espresso and are filled with chocolate covered raisins.
vdayroundup1

rowdy logo from brenna valentines

For a delicious homemade version of Mallomars, put your apron on and make a batch of Vallomar Cookies. They’re a little time-consuming, but soooooo good.

vdayroundup2

rowdy logo from brenna valentines

Valentine’s Day is on a Saturday this month, so you’ll have time to surprise your sweetie with these filled doughnuts. Sugared, glazed, plain…there’s nothing like a fresh doughnut! Jelly Doughnut Hearts
vdayroundup3

rowdy logo from brenna valentines

Cinnamon Spiral Bread is great when toasted, used for special sandwiches, or made into french toast. Bake it in a heart shaped canape pan and slice into thin hearts.
vdayroundup4

rowdy logo from brenna valentines

Light and fluffy, these dainty angel food cakes will just disappear in your mouth! Chocolate Cherry Angel Cakesvdayroundup5

rowdy logo from brenna valentines

As if shortbread cookies aren’t rich enough, I added a chocolate ganache filling and topped them with raspberry jam. You’ve got to try these! Chocolate Raspberry Shortbreadvdayroundup6